Part 2: Remove Google Lock (FRP) on Samsung mobile phone
Factory Reset Protection (FRP), also known as Google lock, is the built-in security feature on Android phones which helps to protect your phone data and screen locks. It will be enabled automatically after you sign into a Google account on your phone. If you forgot the Google account password or there is a previous Google account on the second-hand phone, how can you remove FRP on Samsung mobile phone without password? You can make it done by following steps below:
Step 1: Launch iSunshare Android Password Genius and choose Unlock Google Lock (FRP) on the homepage.

Step 2: Choose Samsung brand and then click the Start button to proceed.

Step 3: Select your device OS version to bypass FRP.
In this section, multiple options are displayed for you to unlock Google Lock. It is highly recommended to use the first option which can apply to all Android versions for FRP unlocking.
Tips: If the software fails to detect your Samsung devices, go back to iSunshare Android Password Genius home page to install the Samsung driver again.

Unlock Google Lock on All Android Versions
Note: The operations between option 1 and option 2 are the same. If you have updated the Android security patch to latest, choose option 1 to remove Google lock. If your Samsung phone is with the old security patch, you can try option 2.
1. Tick the option All Android Versions (Give priority to the new method in 2023) or All Android Versions (compatible with older Samsung phone). Then click the Next button.

2. A pop-out window comes and you can see instructions on it. Just follow it to enter Diagnostic menu and then click the Next button on the software.

3. Then the software will send a message to your Samsung phone. You just need to wait.

4. Then Allow USB Debugging box appears on your phone. Just tick the option and click the OK button on your phone. After that, click the Continue button on the software to begin removing Google lock on Samsung phone.

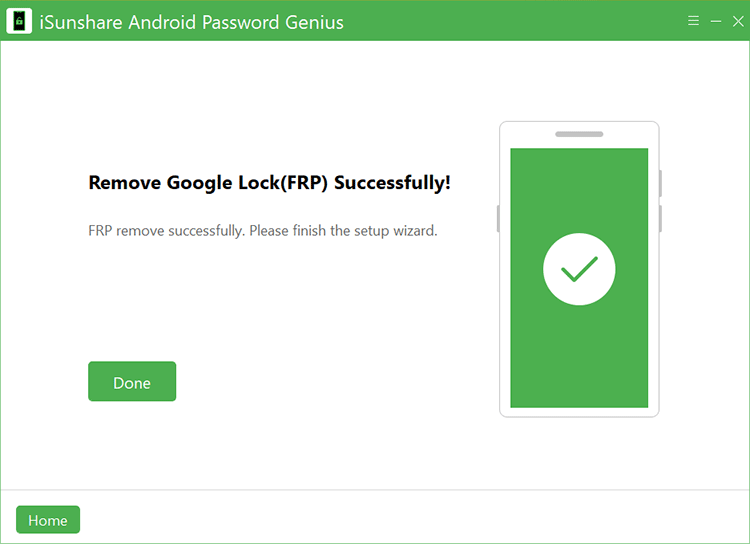
5. The FRP is successfully removed from your Samsung phone.

Unlock Google Lock on Android 11/12/13
On this tutorial, almost all operations are on your phone. But after each step, you can hit on Next on the software to get further instructions.
1. Choose Android OS 11/12 option and hit on the Next button. Then the software will send a notification to your phone.
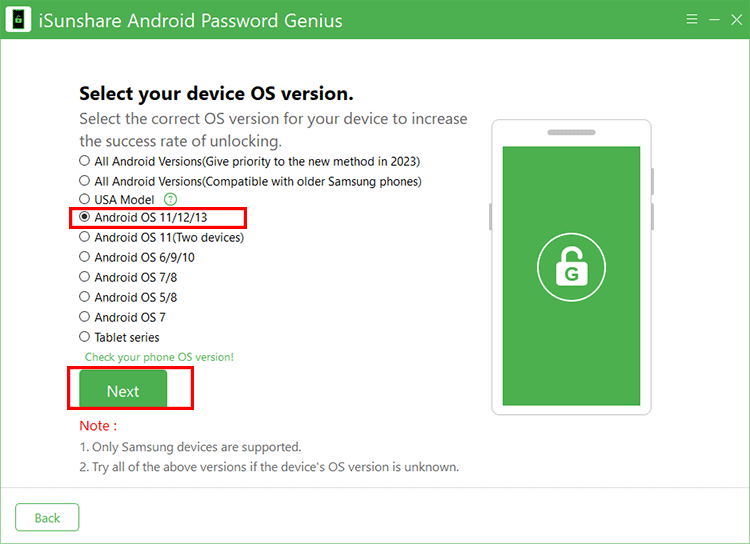
2. On your Samsung phone, tap View and you will be lead to the Galaxy store of Alliance Shield app. Tap Install and the sign in your Samsung account to finish the installation.

3. After the installation, you can open Alliance Shield and tap Next. Then it requires you to sign in with a username and password. If you do not have such an account, visit alliance.org to register one and then finish the login.

4. On your phone screen, name your device and tap Next. Then turn on Device Admin and tap Next. After that, turn on Knox and tap Next.

5. On your phone, tap App Manager. Then tap the search icon to search “server mode”. Now choose Search mode to continue.
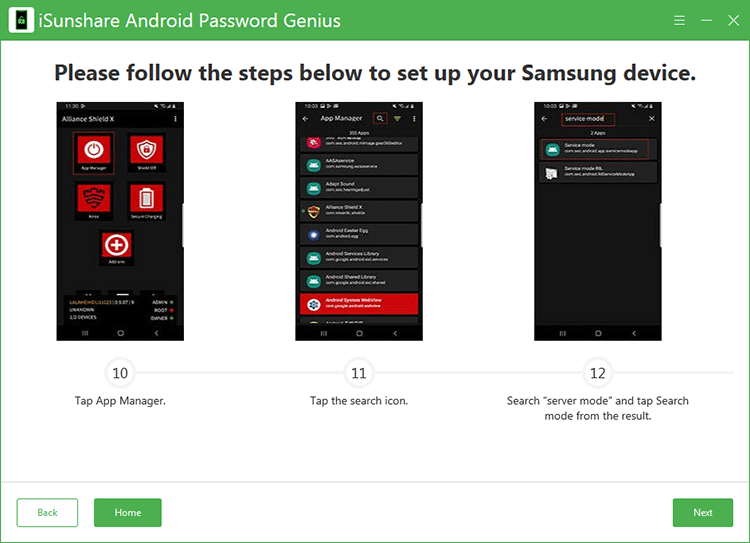
6. Tap ACTIVITIES on the navigation bar. Then choose service mode android.app.modemui.activities.USB.Settings to open. It will offer several modes for you to choose. You need to select MTP +ADB option and tap OK to confirm. In no time, the Allow USB debugging box comes. Tap Allow on your phone. Finally, go back to the software and hit on the Unlock button.

Then Android Password Genius will start to unlock your Google FRP. You just need to wait for the successful message. At last, your Samsung phone reboots with no Google lock.
Unlock Google Lock on Samsung USA Models
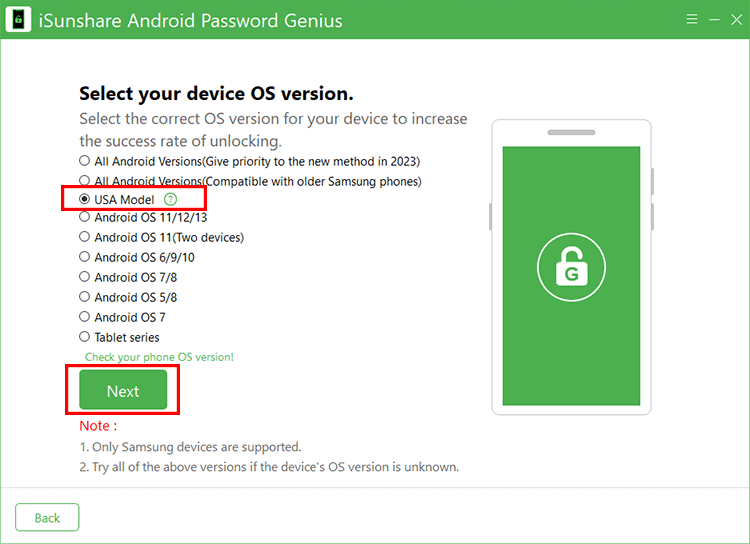
If your Samsung Models are N90xxU, S9xxU, F9xxU, A0xxU, A1xxU, A5xxU and G9xxU, you can select this USA-Model option to bypass FRP lock on Samsung phones.
1. Choose USA-Model and hit the Next button.
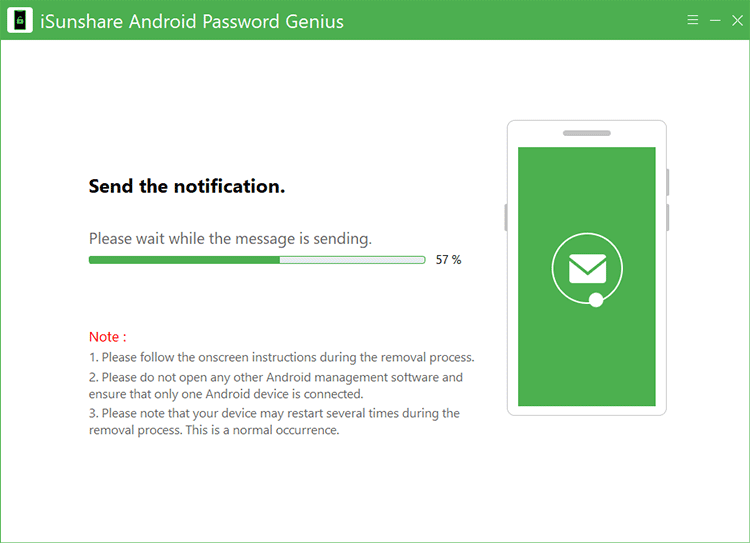
2. In no time, the software will send a notification to your phone. During this process, your Samsung phone may restart several times. You just need to wait patiently.
3. The FRP lock is successfully bypassed. And now you can finish the setup wizard.
Unlock Google Lock on Android OS 11(Two devices)
First of all, you should make sure the Android phone is connected to a stable network. Also, you should have another Samsung phone ready for use. Of course, the Samsung account is needed.
Tips: If you do not know what to do on the phone, you can hit on Next button on the software to get further instructions.
1. Choose Android OS 11 (Two devices) and click the Next button.

2. Get another Samsung phone, open it and head to Google Play Store to download and install Alliance Shield app. After installing, tap Settings > Accounts and backup > back up data. Then sign in your Samsung account. Now choose Apps to back up. After that, you can connect the locked phone to your computer and hit on Next button on the lower right corner of this software.
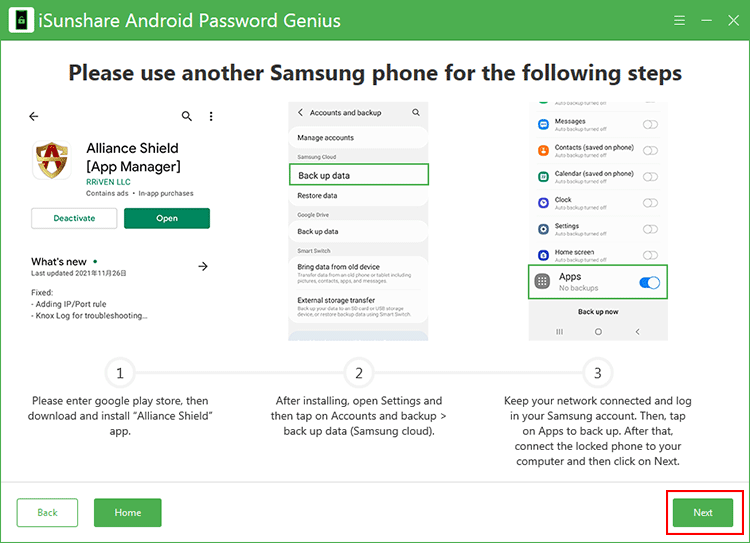
3. Wait for minutes and the software will send a command to your locked phone. Just tap on the View button to enter Samsung Galaxy Store. Search S9 Launcher on the store and download it. It may ask you to sign into the Samsung account. After that, launch S9 Launcher and tap Settings > Accounts and backup > Restore data.

4. Choose Apps and then find Alliance Shield. Then back to the home screen and run Alliance Shield. You need to log in with an account.

5. Name your device and tap on Next. Now enable Device Admin and click on Next. It is the same operation on the next screen to enable Knox.

6. Tap on App Manager and the search for “service mode”. Then tap ACTIVITIES option on navigation toolbar. Choose USB Serial Port Settings > MTP +ADB > OK. Now disconnect your Samsung phone and reconnect it. At this time, click the Next button on this software on your computer.

Then keep the phone connected to your computer and iSunshare Android Password Genius will automatically run to remove the FRP from your phone. When you see the successful message on the software, your phone restarts with no Google lock.

Unlock Google Lock on Android OS 6/9/10
1. Choose Android OS 6/9/10 on the software and click the Next button.

2. The software will send a message to your phone immediately. Tap View on the pop-out message and then you will be guided to the Samsung Galaxy Store to download Samsung Internet Browser. After the installing, open the browser and head to isunshare.com/frp/ page. Tap on Open Settings to continue.

3. Select the PIN option and then make sure Do not require is selected. After that, set a PIN and confirm it.

4. When you see Keep your device unlocked while it’s on you page, tap on Skip and the return to the Wi-Fi connection page. Reconnect your Wi-Fi and enter your current PIN. Then tap on Continue and sign in with your Google account.

You can follow the on-screen instructions to set up the phone and restart it.
Unlock Google Lock on Android OS 7/8
1. Choose Android OS 7/8 and hit on Next button to go ahead.

2. Instantly, the software will send a notification to your phone. Tap on View to download and install Samsung Internet Browser. If you have installed this browser before, just head to isunshare.com/frp/ and tap on Open Settings button. After that, select the PIN option.

3. Then ensure Do not require option is selected. Click Next and set your PIN.

4. Skip the settings to keep your device unlocked while it’s on you. Then go back to Wi-Fi connection page to reconnect Wi-Fi and complete the settings. After that, tap on Continue to enter your Google account to set up the Samsung phone. You need to restart it after finish the settings.

Unlock Google Lock on Android OS 5/8
1. Select the option – Android OS 5/8 and then click the Next button.

2. Then iSunshare Android Password Genius will send a message to your Samsung phone. Tap View and then go to open Samsung browser. Search isunshare.com/bypass/ and open it. In no time, download the corresponding apk.

3. After downloading, tap Bookmarks and then go to the HISTORY tab. Open DOWNLOAD HISTORY and then install your downloaded apk. When you get a prompt, tap Settings to continue.

4. Turn on Allow from this source. Then continue to install the apk. After that, go back to the DOWNLOAD HISTORY and install the bypass.apk. After installation, open it directly. Go to click the Settings icon and then tap Browser sign-in.

5. Tap OK and then sign in with a new Google account. After you successfully log in, restart the phone. Now, the original FRP is removed.

Unlock Google Lock on Android OS 7
1. Choose Android OS 7 option and then hit on the Next button.

2. Then the software will send a command to your phone. Just tap View on your phone screen to open Google Map. Tap Show your location icon on the bottom right corner of your phone and allow using location. Then set a destination and tap Start to start navigation. Say “Open Chrome” via voice command to open Chrome.

3. Click Accept & continue. Then open isunshare.com/bypass in the Chrome. To remove FRP, download android7.apk. Then download quickshortcut.apk and open it.

4. Tap Settings to allow installing the app. Then install and open QuickShortcutMaker, input My Files to search. From the result, click the My Files icon in the search result. Click Try to open it.

5. Find the android7.apk you downloaded and click to install it. After that, back to QuickShortcutMaker and search Settings. Then choose any Settings icon from the result and tap Try to proceed.

6. Choose Lock screen and security > Other security settings > Phone administrator. Then in DEVICE ADMIN APPS, uncheck Find My Device option.

7. Back to Settings, tap Apps > Application manager > Google Play service > DISABLE. After that, return Settings, tap Accounts > Add account.

8. Add a new Google account. After that, back to Settings, access Apps > Application manager > Google Play service > ENABLE. Finally, restart the phone and sign in with the new Google account.

When you open the Samsung phone, go to Settings > Apps > Application manager and find FRP bypass tool TecnocareTricks. Choose it to uninstall this app.

Unlock Google Lock on Samsung Tablet
If you want to remove FRP lock on Samsung Tablet series, iSunshare Android Password Genius can help you to do that.
1. Choose Tablet series on Select your device OS version interface. Then click Next button.

2. In no time, the software will send a notification to your Samsung tablet series device. Tap View on it and then download, install and open Samsung Internet Browser.

3. On Samsung Internet browser, open www.isunshare.com/frp1/ webpage and click Open Dialpad button. After that, delete the default number and tap *#0*# to enable diagnostic menu. When you see the diagnostic menu on your device, go back to the software and click the Next button.

4. In minutes, your device will get a pop-out notification. You need to allow USB debugging on the device and then hit Next button on the software.

5. Immediately, the software will run to remove the FRP lock on your Samsung Tablet series. You will get the successful message in the end.
Part 3: How to Check Your Samsung OS Version
If you do not know the phone OS version, you can click the text Check your phone OS version to get the tutorial to check OS version on your Samsung when you are locked out of FRP.

Step 1: Press and hold the volume up and power key until you see Samsung logo.
Step 2: You just need to wait during installing system update process.

Step 3: After your phone in recovery mode scree, you can check the device OS version. After that, choose to reboot system.

Part 4: Remove Google Lock (FRP) on Vivo phone
If you want to sell the Vivo phone with a Google account which you forgot the passcode, how can you bypass the Google account verification after factory reset the Vivo phone? Or if you want to bypass the PIN/Pattern verification as you do not have the Google account credentials, what to do? iSunshare Android Password Genius can help you bypass Vivo FRP in minutes.
Step 1: Launch iSunshare Android Password Genius and choose Unlock Google Lock option.

Step 2: Select Vivo brand.

Step 3: Connect your Vivo phone to the computer and then hit the Start button.

Step 4: In no time, the software will send a notification to your Vivo phone.

Step 5: Just follow the on-screen instruction to set up your Vivo phone. And you can click the Next button on the right bottom corner to proceed with the process.

Step 6: Minutes later, your Vivo phone restarts and you can set it up without the Google account verification screen.

Part 5: Remove Google FRP Lock on Xiaomi/Redmi Phones
Is there any way to bypass Xiaomi/Redmi FRP MIUI 13? Yes, this Xiaomi/Redmi FRP bypass tool can help you to remove Google FRP lock on Mi series phones in simple clicks.
Step 1: Launch iSunshare Android Password Genius and choose Unlock Google Lock (FRP) option in the interface. The Xiaomi or Redmi phones should be connected to your PC in advance.

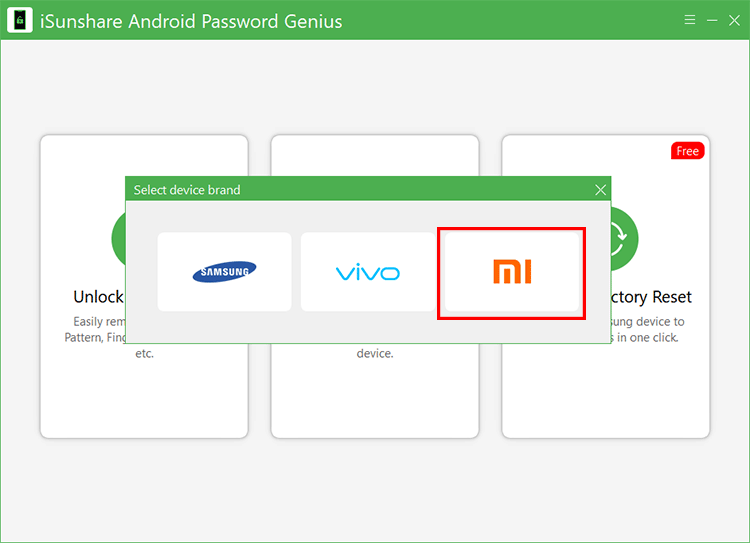
Since we are going to bypass Xiaomi/Redmi Google account verification, choose Mi brand from the prompt.
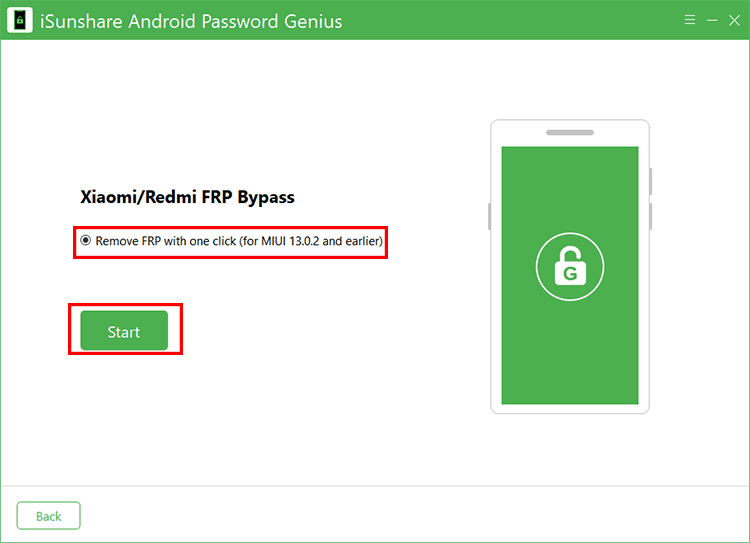
Step 2: Tick the option: Remove FRP with one click (for MIUI 13.0.2 and earlier). Then click the Start button.
Step 3: Follow the onscreen steps to enter Miassistant.
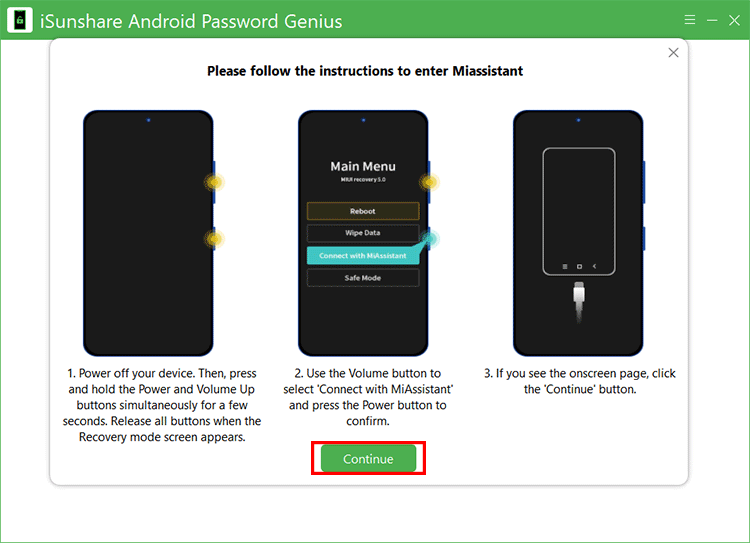
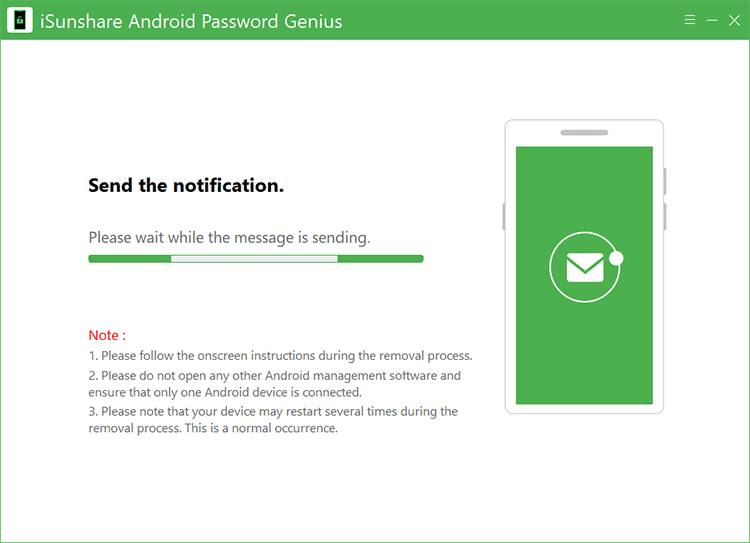
Step 4: After that, you need to wait patiently until the removal process ends.
Step 5: Finally, the FRP lock is removed successfully, click Done to end the process.

Part 6: One-click to Factory Reset Samsung Phones and Tablets [Free]
If your Samsung devices are set with no screen lock or you can unlock the Samsung phones and tablets, you can use this function to factory reset Samsung phone with a simple click. If your Samsung phone or tablet is locked with the screen lock, you need to use Unlock Screen Lock function in Part 1 to reset your iPhone without passcode.
Step 1: Connect your Samsung devices to your computer and allow the computer to access to your data. Then open iSunshare Android Password Genius and click One-click Factory Reset.

Step 2: Pay attention to the Warning texts and click the Reset button.

Step 3: In no time, the Samsung phone is reset to factory settings. You can set it up to use.


