I would like to sell my Sony Vaio laptop to my friend. But it is locked so that I cannot get the content in the Sony laptop to my new laptop. This Sony Vaio laptop is pre-installed in UEFI Boot mode. How can I access it to safely export files and folders from my Sony Vaio laptop?
In order to take out files from the Sony laptop, we should unlock the Sony laptop by resetting or removing the Windows 8 login password, which needs a password reset disk.
Such a password reset disk can be created on an accessible Windows computer or with a Windows password recovery program. In this situation, only the Windows password recovery tool can help. So don’t hesitate to get Windows Password Genius Advanced on your new laptop and create a password reset disk with it for the Sony laptop.
How to unlock Sony laptop with UEFI BIOS
Section 1: Create password reset disk with Windows Password Genius
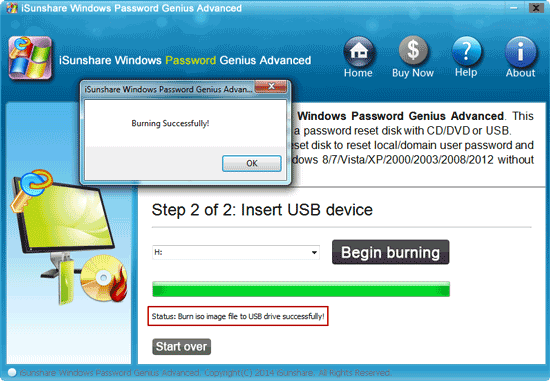
After installing Windows Password Genius Advanced full version on the computer, you would find there is an ISO file in the installation directory. You can burn it into a bootable USB drive with UltraISO. Or directly run Windows Password Genius to burn it into a blank USB drive with the help of program burning feature. Password reset disk will be created and saved in the USB drive.
Section 2: Set locked Sony laptop boot from USB drive – password reset disk
Plug the USB drive into the locked Sony laptop, and follow steps below to make some changes for booting the laptop from the USB drive.
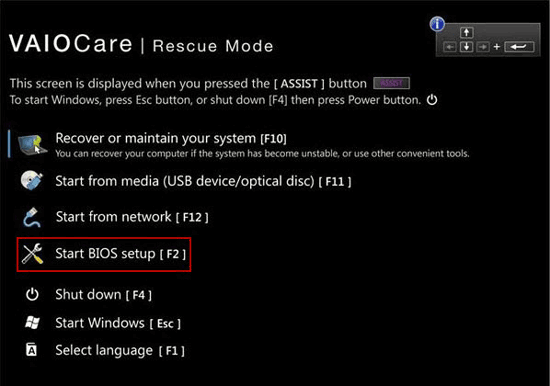
1. Power off the Sony laptop and press the Assist key to enter the VAOCare Rescue Mode Boot screen.
2. Select the Start BIOS setup [F2] to proceed to the system BIOS.
3. Once entering BIOS Setup Utility, select the Boot tab and Boot Mode option.
4. Press Enter to change boot mode from UEFI to Legacy.
5. Switch to Security tab, disable Secure Boot option and save changes.
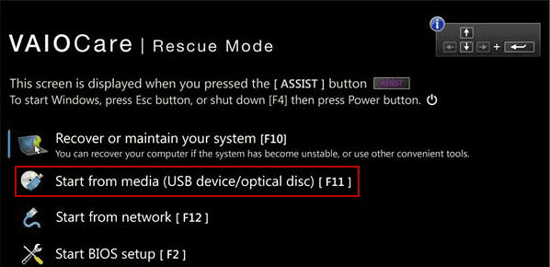
6. Turn off the Sony laptop and press the Assist Key to enter VAOCare Rescue Mode Boot screen again.
7. Select option Start from media (USB device/optical disc) [F11] to start the Sony laptop from the USB drive.
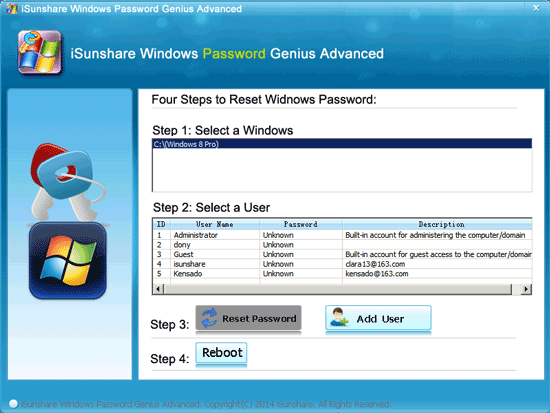
Instantly, the Sony laptop will boot from the USB drive and run Windows Password Genius Advanced, which locates Windows 8 all user accounts and their passwords’ statuses in the list.
Section 3: Reset UEFI-based Sony laptop password with USB disk
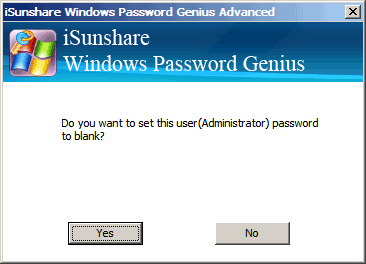
Select the user account in the list and click on the “Reset Password” button. The program will prompt you that the user password will be blank or to be “iSunshare@2012”, which depends on account type.
Reboot the Sony laptop and eject the USB drive. But don’t forget to restore Sony laptop boot mode to factory default, UEFI. Then you can successfully login the Windows 8 Sony laptop without a password or new password. Transfer any files or folders from the Sony laptop to your new laptop.
Related Articles:
