“My computer has one or more partitions, I want to repartition it without data loss. How can I do?”
In order to manage your computer more conveniently and safely, a number of people are facing the complex problem of repartition. Especially it is troublesome for the newbies. Whether you have only one partition or several, this post will introduce to you the extraordinarily simple ways to repartition a hard drive without losing data.
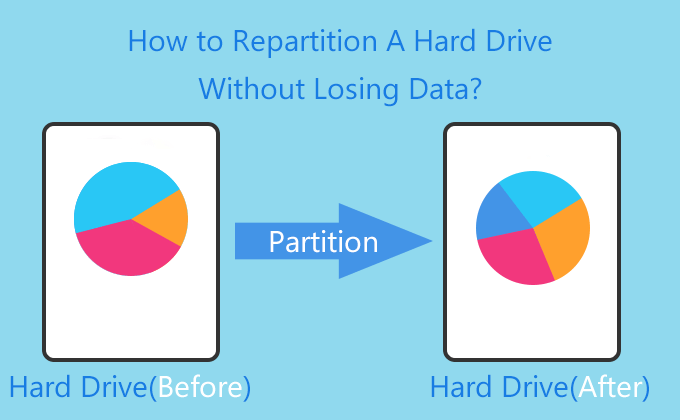
Case 1: Only one partition
In this case, you can directly repartition hard drive without data loss on the Windows’ Disk Management utility. The specific steps are listed as follows.
Firstly, Shrink the only partition to the size you want. Steps are as follows:
Tips: If the only partition doesn’t have enough free space for shrinking, you have to move the data to another disk to backup before shrinking the partition.
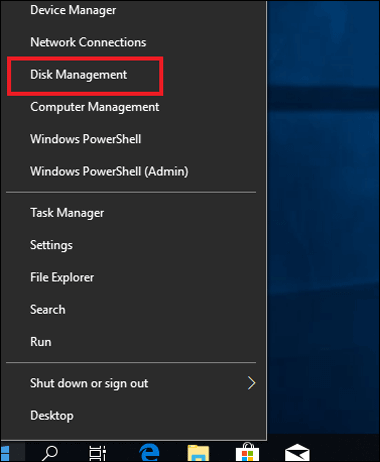
Step 1: Right-click Start button (the bottom-left corner of desktop), and then click Disk Management.
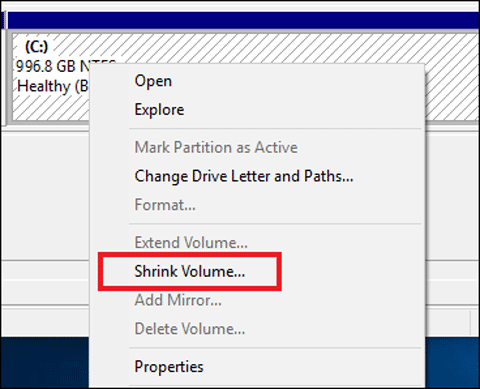
Step 2: Right-click the only partition and then click Shrink Volume in the context menu.
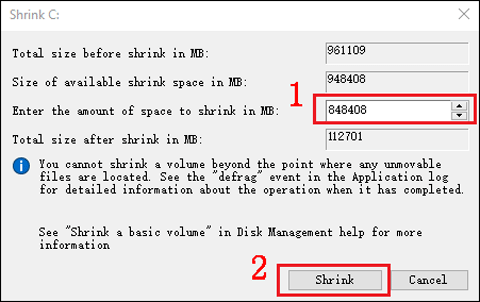
Step 3: Enter the amount of space you want to shrink in MB, and then click the Shrink button.
After shrinking, the drive has one partition and unallocated space.

Next, you can partition the unallocated space to one or more volumes. Steps are as follows:
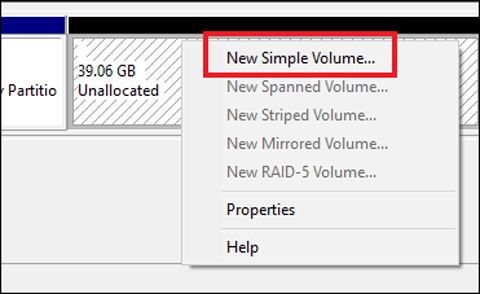
Step 1: Right-click the unallocated space and click New Simple Volume in the context menu.
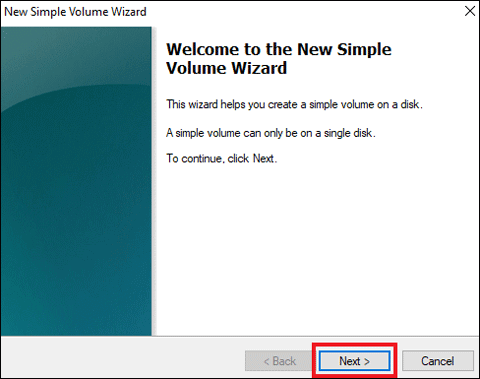
Step 2: Click Next on the New Simple Volume Wizard window.
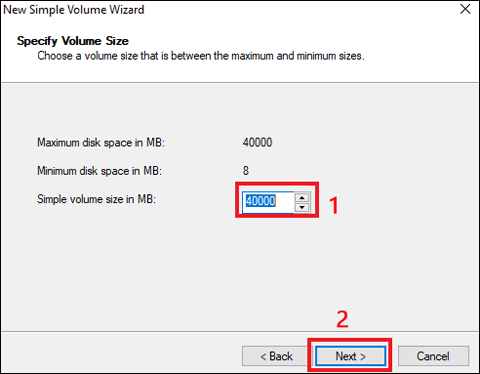
Step 3: Specify the amount of space you want to assign to this new partition and click Next.
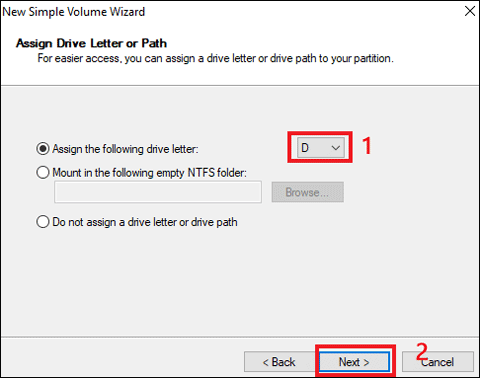
Step 4: Assign the drive letter or path to your partition and click Next.
Step 5: Choose the settings of your preference and click Next.
Tips: If you are unclear what to choose, it will be better to leave the default settings unmodified.
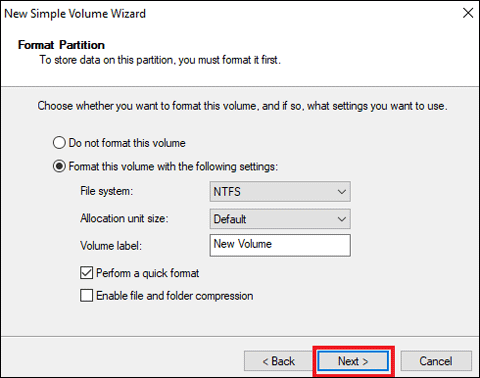
Step 6: Click Finish.

Case 2: Several partitions
In this case, if you want to repartition your hard drive without losing data, you have to use a third-party tool. There are lots of partition tools on the Internet that allow you to repartition, but most of them are complicated. Here we can use a very simple but practical tool CloneGo and Windows’ Disk Management to repartition.
- Part 1: Back up all the partitions except C Drive with CloneGo.
- Part 2: Delete and create new partitions with Disk Management tool.
- Part 3: Restore the data to the new partitions with CloneGo.
Part 1: Back up all the partitions except C Drive with CloneGo.
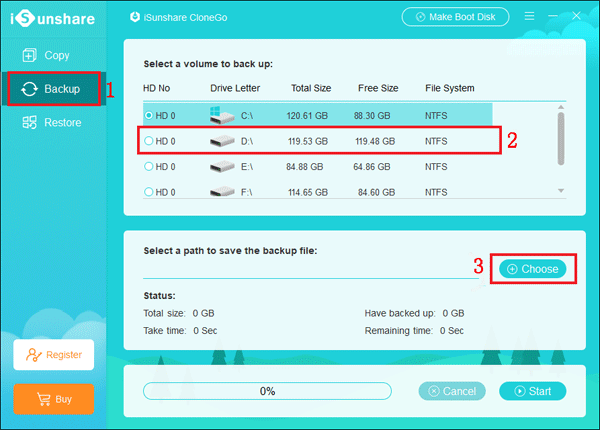
Step 1: Open CloneGo and click Backup on the left panel.
Step 2: Click the D Drive that you want to back up.
Step 3: Click Choose to select a path.
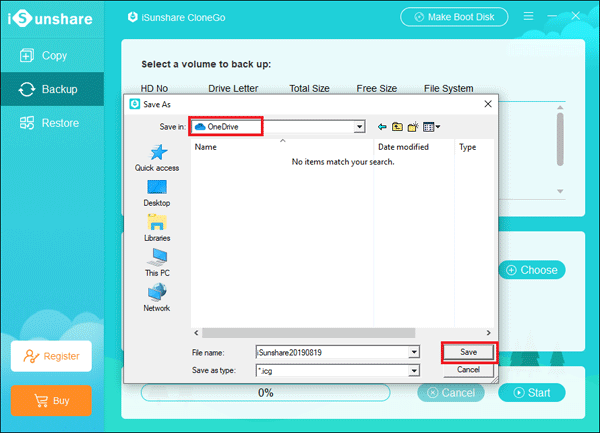
Step 4: Choose the destination and click Save. It can be the Cloud Drive or any partition in a different hard disk.
Step 5: Click Start and then Click OK to confirm the backup operation.
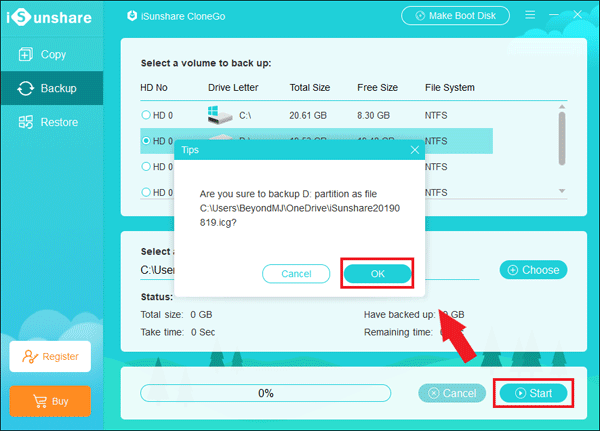
After that, the data of D drive will be compressed as a file in another place, which can be restored with CloneGo. You can also backup other partitions referring to the above steps.
Part 2: Delete and create new partitions with Disk Management tool.
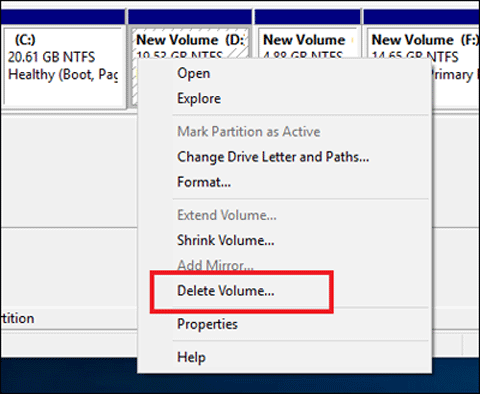
Step 1: Open the Disk Management tool. Right-click the partition and then click Delete volume in the context menu.
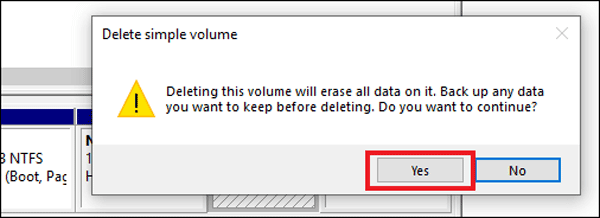
Step 2: Click Yes to continue deleting.
Step 3: Repeat the above two steps to delete all the partitions except C Drive.
Finally, your hard drive will have only one partition(C:) and the unallocated space. As a result, you can refer to the Case 1 to create new partitions as you like.
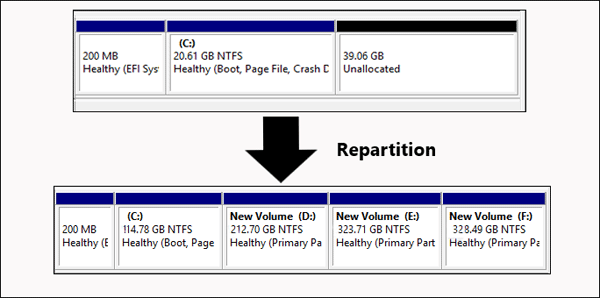
Part 3: Restore the data to the new partitions with CloneGo.
Step 1: Open CloneGo and click Restore on the left panel.
Step 2: Select the restoration destination.
Step 3: Choose a backup file to restore.
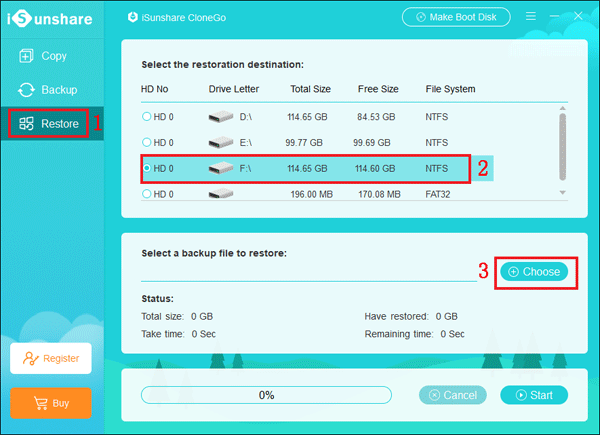
Step 4: Click Start and click OK to continue restoring.
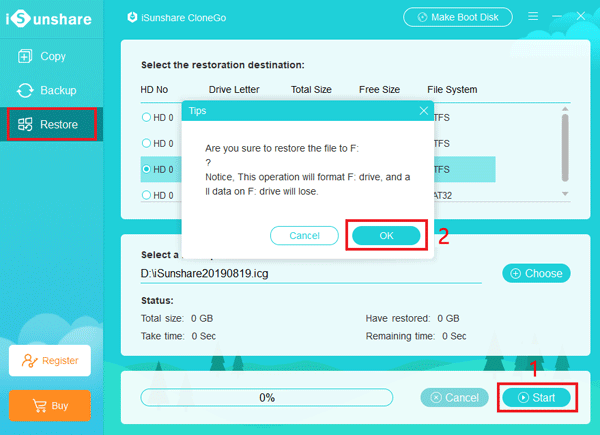
Step 5: Repeat the above steps to restore all the backup files.
In the end, you will repartition your hard drive without losing data.
Related Articles:
This is so chock full of useful information. it help me a lot!Your exuberance is refreshing.