Is it possible to protect all worksheets or a particular sheet from deletion? If it is, how can you do to restrict any users from deleting excel sheets? Here 2 options in this passage are available for you if you need, which will disable delete sheet option in Excel.
- Option 1: Protect Workbook structure with password
- Option 2: Disable “Delete” command on sheet tab with VBA
Option 1: Prevent Excel Sheets Deletion by Workbook Structure Protection
As is known, once workbook structure is protected with password, unless you could get the right password or remove password to unprotect excel workbook structure, otherwise, you will not insert, delete, rename, remove, copy, hide or unhide worksheets in this Excel workbook.
So why not take this Excel feature to protect Excel sheets from being deleted?
1. Open your Excel workbook that includes worksheets you need to protect.
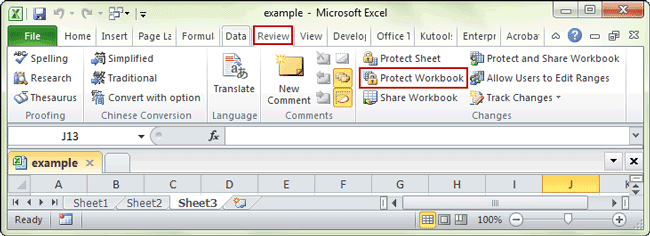
2. Tap on Review menu and click Protect Workbook in Changes group.
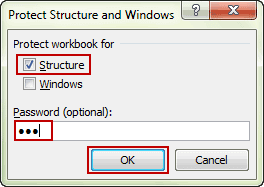
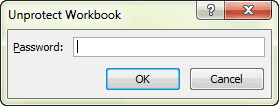
3. Confirm Structure is checked and enter a password in following dialog Protect Structure and Windows.
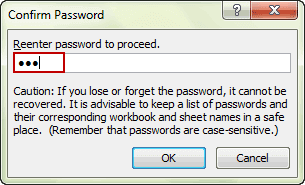
4. Click OK and reenter the same password.
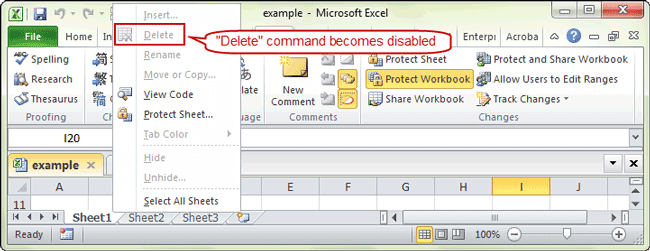
5. Click OK then you can see all the worksheets become undeleted.
Tips: Only after unprotecting excel workbook, can you do anything again on this workbook including excel sheet deletion. If forgot password to unprotect excel workbook structure, what you need is only one click on powerful software Workbook Unprotect Genius to remove forgotten password.
Option 2: Prevent A Particular Sheet from Deletion with VBA
If you just want to prevent users from deleting one particular sheet, try this option, because option 1 will not be available. But if you would like to protect all sheets from deletion, this method also works.
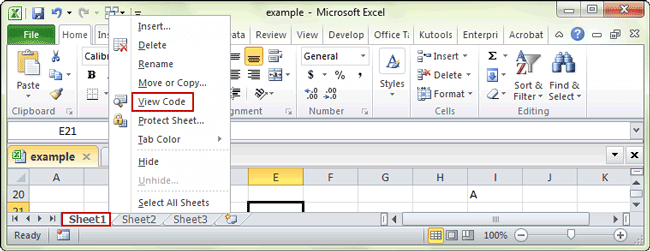
1. Open Excel workbook, and right click on any sheet tab. Then select View Code.
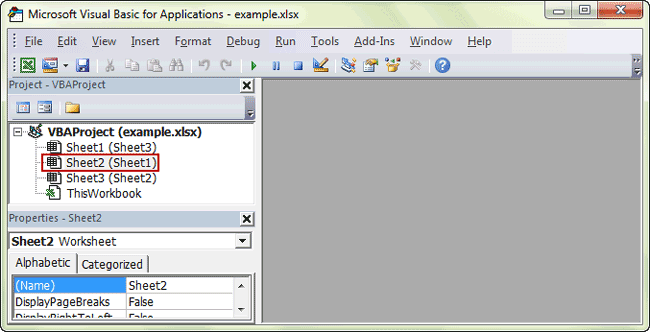
2. Visual Basic Editor is opened. (Also you can press Alt + F11 to directly open it.)
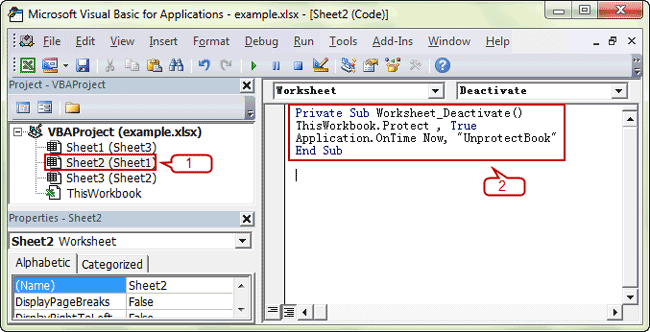
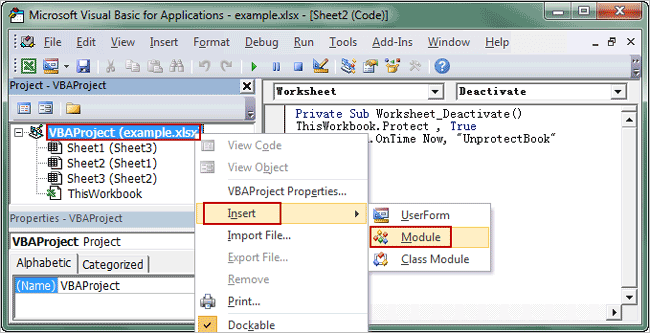
3. Double-click the sheet on the left pane you want to protect, and paste following codes in the right pane.
Private Sub Worksheet_Deactivate()
ThisWorkbook.Protect , True
Application.OnTime Now, “UnprotectBook”
End Sub
4. Right-click the VBA Objects then on the left and select Insert > Module to create a module.
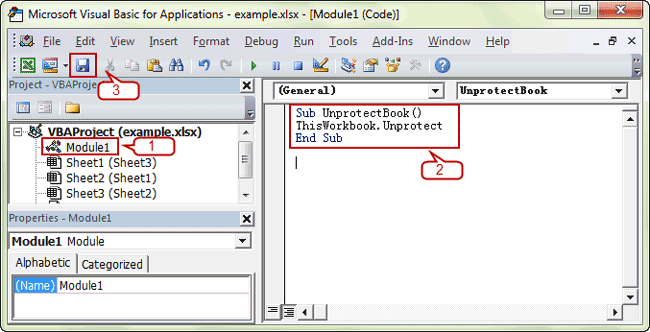
5. Enter following codes in the right white area of Module.
Sub UnprotectBook()
ThisWorkbook.Unprotect
End Sub
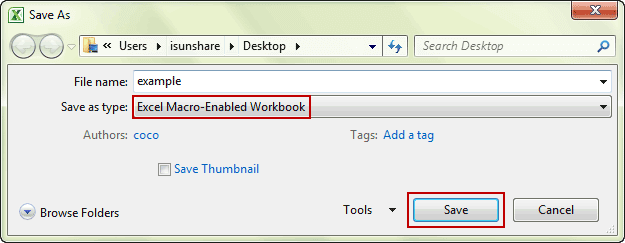
6. Then click Save button in VBA editor and click No when you get a pop-up warning message “The following features cannot be saved in macro-free workbook“.
And in following Save As dialog box, choose to save it as Excel-Macro Enabled Workbook (*.xlsm) and click Save button.
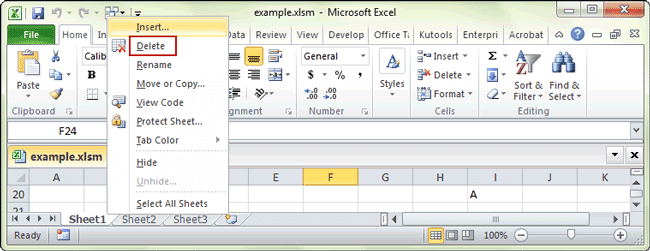
7. Now open the .xlsm file in Excel and try to delete sheet in the macro-enabled workbook.
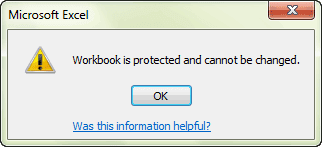
When you see a message, click “Delete” and you would find it is prevented from being deleted, because workbook has been protected and cannot be changed anymore.
Related Articles:
