Clone a VM in hyper v, which can make a copy of an existing virtual machine without install again. It is a great useful feature; however, Hyper-V doesn’t provide any straightforward options for us to create. Accordingly, let’s see two workarounds below of how to clone a virtual machine in Hyper-V Windows 10 with ease.
Here are two options you can try below:
- Option 1: How to Clone a Virtual Machine via Export and Import
- Option 2: How to Clone a Virtual Machine by Copying the Virtual Hard Disk
Preparation
Before cloning a virtual machine in Hyper-V, we need to run the system prepare tool (Also named Sysprep.exe in the host machine) if the virtual machine joins to Active Directory (AD) domain on the same network. It would wipe the unique security identifier (SID) and prevent two computers from having the same IP or name. Run system preparation tool won’t cost too much time or cause any damage of your Windows files.
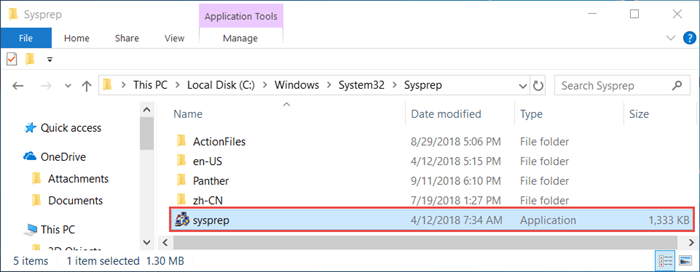
Step 1: Navigate to C:\Windows\System32\Sysprep. Double-click on the Sysprep.exe file to run the entire Windows setup process.
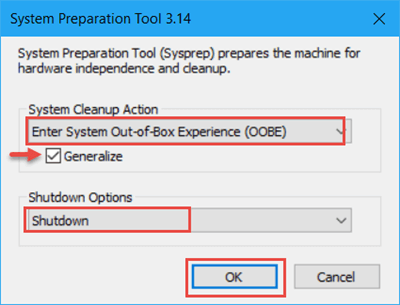
Step 2: Select Enter System Out-of-Box Experience (OOBE) from the drop-down, check the box of Generalize and choose Shutdown as the image below. Tap OK to begin.
Option 1: How to Clone a Virtual Machine via Export and Import
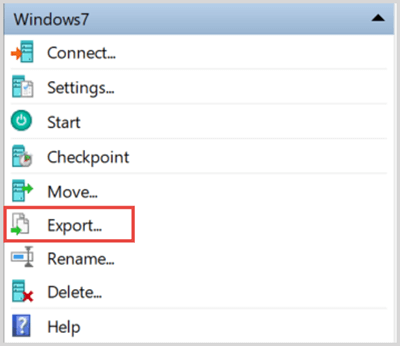
Step 1: In Hyper-V Manager windows, select a virtual machine and click on Export on the right panel.
Step 2: Specify a location to save the files and then tap on Export.
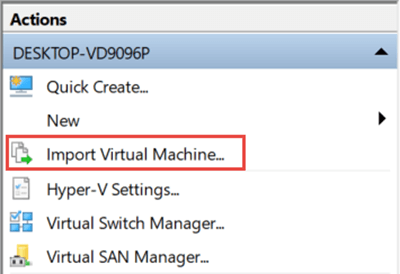
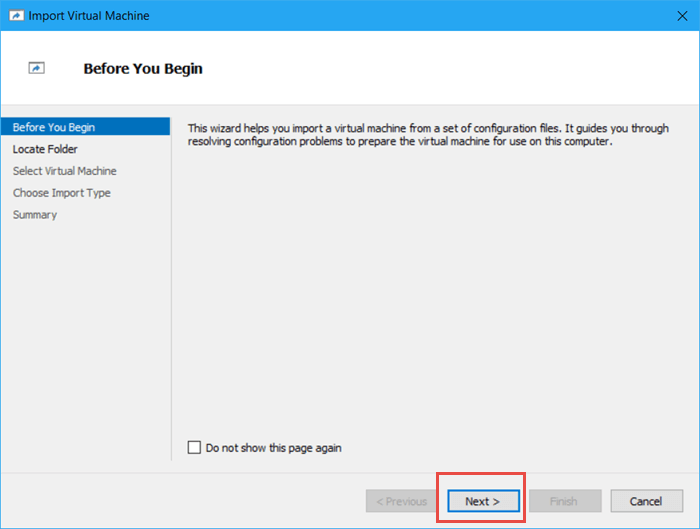
Step 3: Click on Import Virtual Machine.
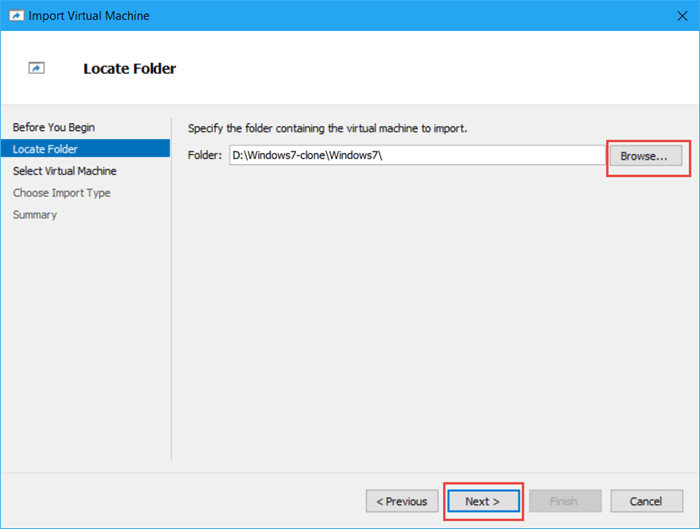
Step 4: Click on Next and locate the folder that you export above.
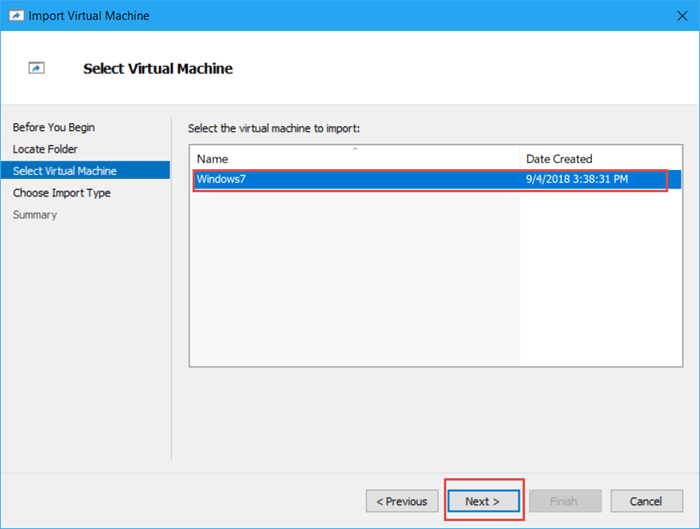
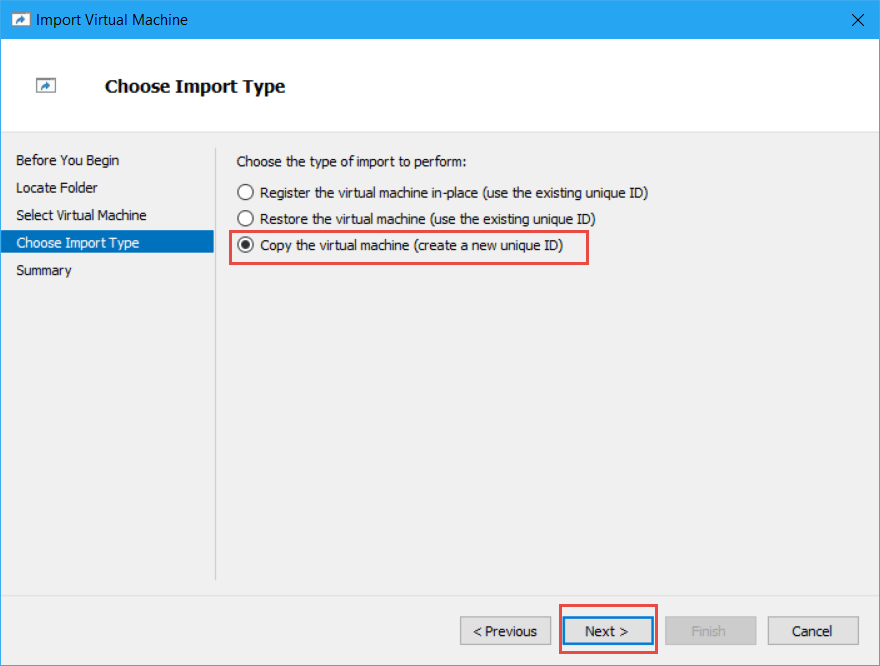
Step 5: Select a virtual machine and choose import type.
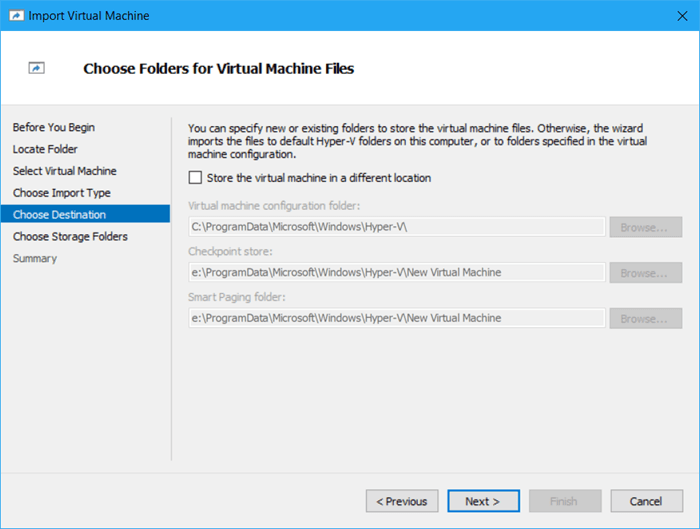
Step 6: Choose a new or existing folder for virtual machine.
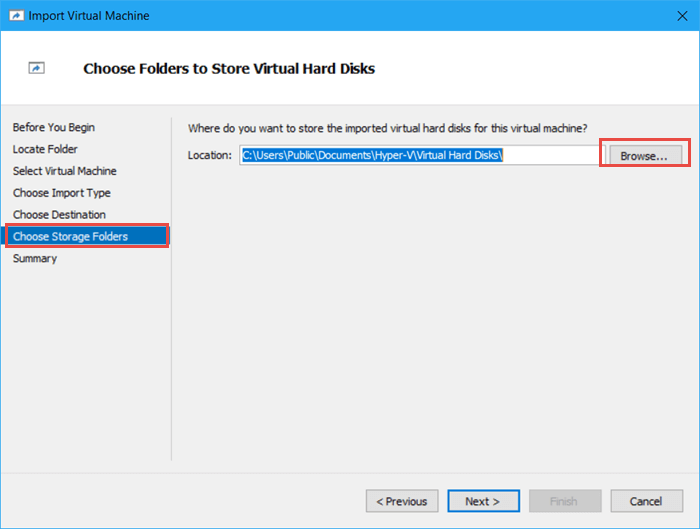
Step 7: Choose a folder to the imported virtual hard disk.
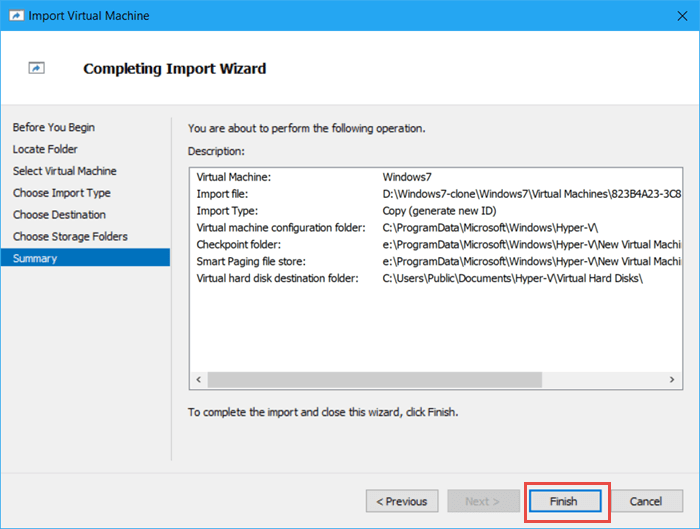
Step 8: Tap on Finish to complete the import wizard.
Option 2: How to Clone a Virtual Machine by Copying the Virtual Hard Disk
Step 1: Right-click on the virtual machine that you want to clone and select Settings.
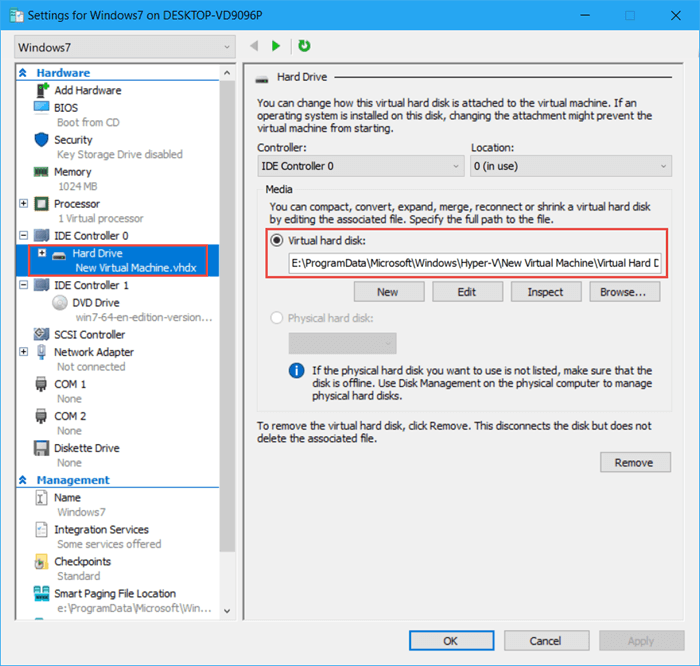
Step 2: Click on Hard Drive in the left panel. Then you can see where the location of the virtual hard disk is.
Step 3: Locate to the folder of the virtual hard disk and right-click to copy it. Rename the cloned virtual hard disk.
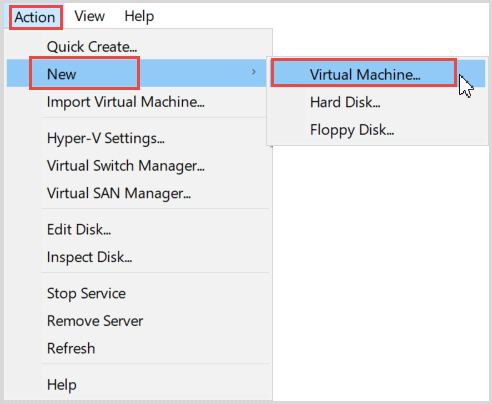
Step 4: Click on Action > New > Virtual Machine from the menu bar.
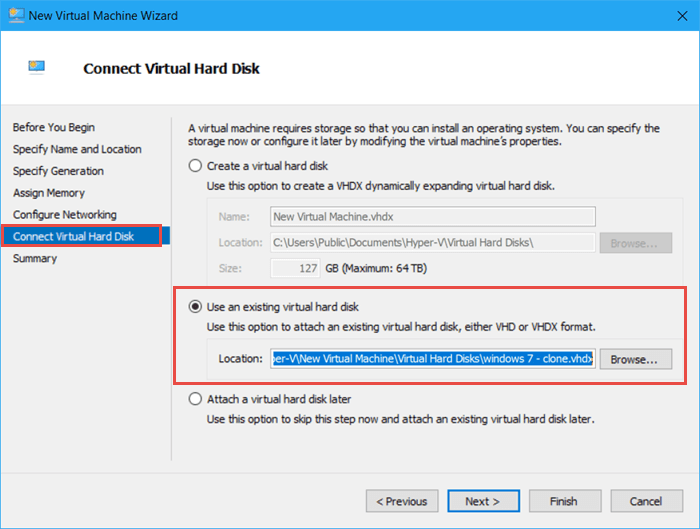
Step 5: Follow the New Virtual Machine Wizard to create a new one. In the Connect Virtual Hard Disk, select Use an existing virtual hard disk. Click on Browse to locate to the cloned virtual hard disk. Tap on Next to complete the wizard.


Thank you for this post, it is very helpful to me! Way easier to understand than other bloggers out there.