If you use VMware Workstation or VirtualBox to create a virtual machine, you may find that there is a .vmdk file in hard drive occupying plenty of space, even as high as tens of gigabytes. A virtual machine disk (.vmdk) file is used to store all the data of a virtual machine’s hard drive. As the data is added to a virtual disk over time, the size of .vmdk file will grow larger and larger. So, it is necessary for us to reduce the size of virtual machine disk. In this post, we will introduce three effective methods to shrink virtual machine disk size in VMware Workstation.
- Method 1: Shrink virtual machine disk size by Compacting disk
- Method 2: Shrink virtual machine disk size with Disk Cleanup
- Method 3: Shrink virtual machine disk size by third-party tool
Method 1: Shrink virtual machine disk size by Compacting disk
VMware Workstation provides us with a feature that allows us to compress disks to reclaim the unused space. So, you can use it to shrink the size of virtual machine disk and here is what to do.
Step 1: Open VMware Workstation application and open a virtual machine (Shortcut: Ctrl + O).
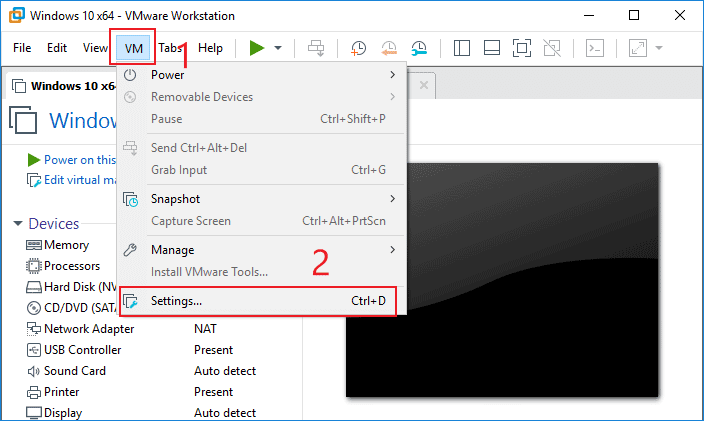
Step 2: Click VM tab and select Settings option to open Virtual Machine Settings window (Shortcut: Ctrl + D).
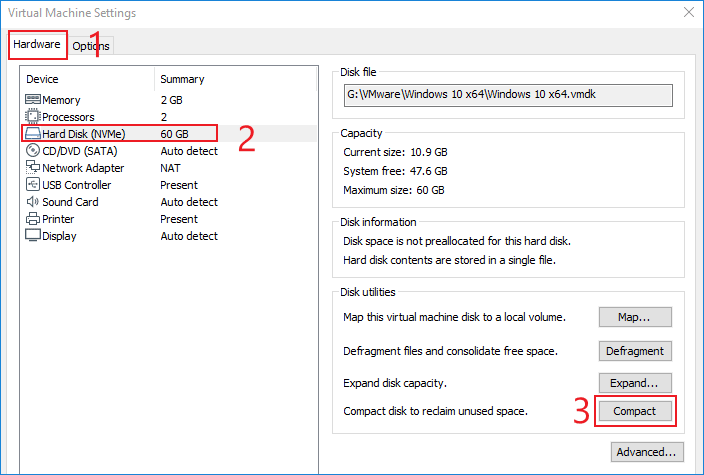
Step 3: On Hardware tab, click Hard Disk option in the left pane and the click Compact button in the right pane.
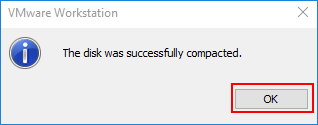
Step 4: Then wait for a while until a popup window prompts that the disk was successfully compacted. Click OK button to close the window. Finally, you can find out that the size of .vmdk file has been reduced dramatically.
Method 2: Shrink virtual machine disk size with Disk Cleanup
In addition, VMware Workstation also offers us Disk Cleanup feature that can reclaim disk space that is allocated to virtual disk files but that the guest OS no longer uses. It is also very helpful to shrink the size of virtual machine disk in VMware Workstation. The following steps will guide you through this operation.
Step 1: Open VMware Workstation application and open a virtual machine (Shortcut: Ctrl + O).
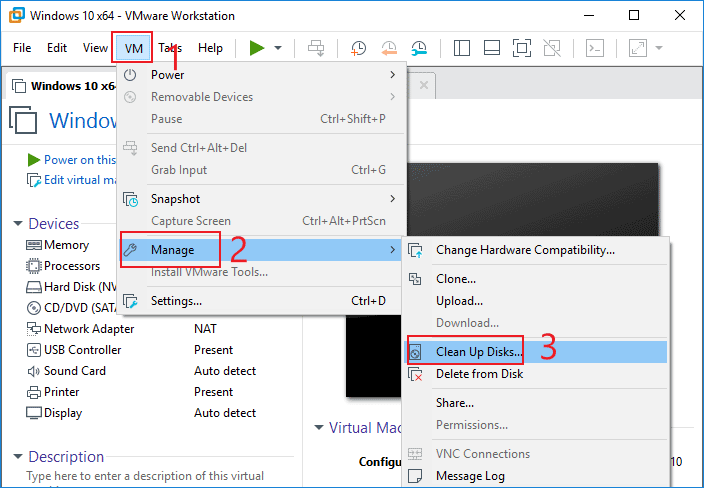
Step 2: Click VM tab and move the mouse cursor over Manage option and then select Clean Up Disks option.
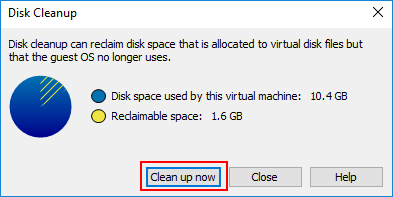
Step 3: On the popup window, click Clean up now button to start cleaning up.
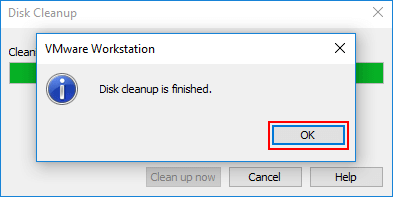
Step 4: Wait for a while until a popup window prompts that Disk cleanup is finished. Then click OK button to close the window. After this operation, the size of .vmdk file in VMware Workstation can be reduced to some extent.
Method 3: Shrink virtual machine disk size by third-party tool
In the end, you can also shrink virtual machine disk size by third-party tool. Actually, the more files in virtual machine, the more space the virtual machine disk occupies. So, cleaning up the junk files in the virtual machine can effectively reduce the space occupied by the virtual hard disk. For more convenience, you can install a cleanup tool in the virtual machine and use it to remove the useless files from virtual machine. Here I recommend a cleanup tool named iSunshare System Genius that designed to clean up the junk files and the registry to free up disk space with one click. Here are detailed steps to use it to free up virtual machine disk.
Step 1: Open the virtual machine in VMware Workstation and download and install this tool on your virtual machine. Then launch it.
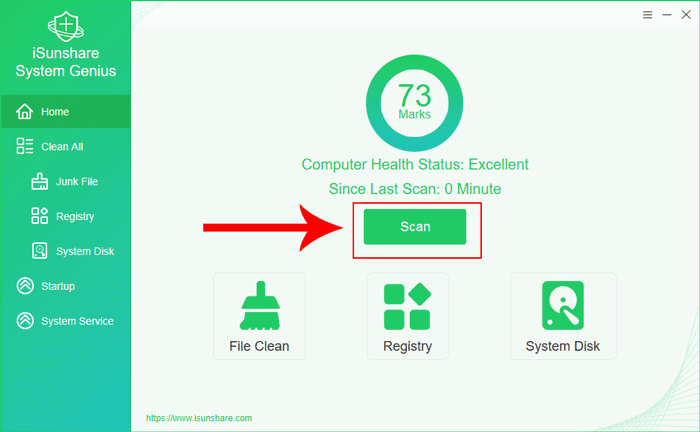
Step 2: Click Scan button to scan and the virtual machine thoroughly.
Step 3: Wait for a while until scanning is completed and the scan results will be shown on the screen, listing all kinds of useless files on your computer. Then click Clean button to clean up all the selected files in one go.
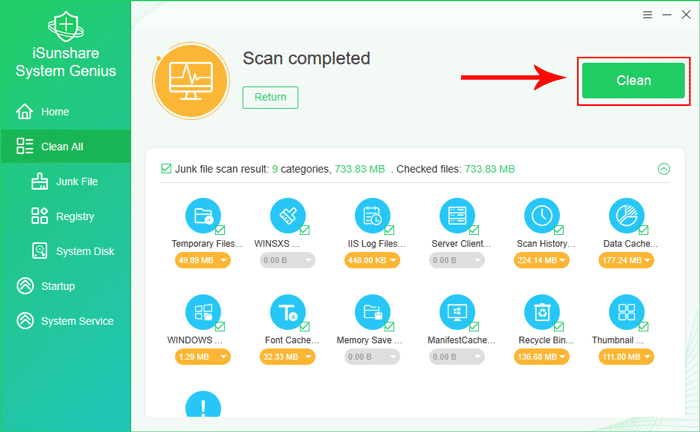
Step 4: Once completed, click OK button to exit. Ultimately, the virtual machine has freed up a lot of space and the size of virtual disk has been shrunken successfully.

Tips: In addition, iSunshare System Genius is a multi-functional Windows optimization utility that can help you free up system disk space with one click, disable the auto-run programs and manage Windows system services, etc.
Related Articles:
