If you want to remove digital ID or digital ID files from Adobe Reader or Adobe Acrobat Pro, the direct way is to uninstall them, and reinstall them and then re-create digital ID and signature. But in fact, even though we don’t uninstall Adobe Reader or Adobe Acrobat Pro, digital ID or files can be removed too.
Option 1: Remove Digital ID from Adobe Reader or Adobe Acrobat
This is Adobe Acrobat XI Pro. It will guide you to remove Digital ID in Acrobat Pro Preferences.
1. In Adobe Acrobat XI Professional, click on Edit – Preferences.
2. Choose Signatures in the left categories, and click “More” after Identities & Trusted Certificates.
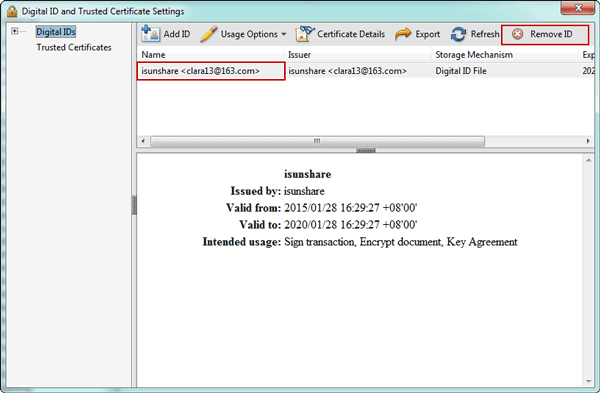
3. Click Digital ID, and you can see what they are. Select the digital ID you want to remove. Then click Remove ID.
Option 2: Delete Digital ID File in Acrobat Pro Preferences or from Computer File Route
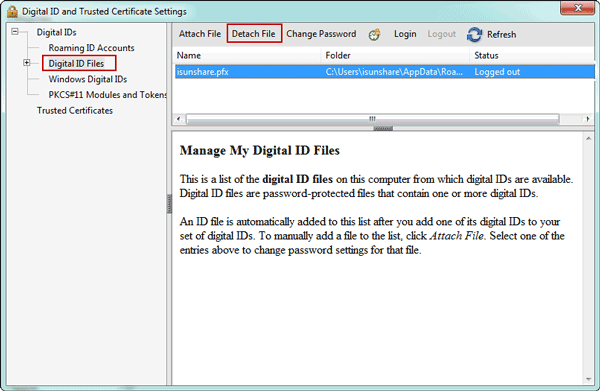
1. Expand the tree view under Digital IDs and then select Digital ID Files.
2. Highlight the file name on the list box on the rights.
3. Click the Detach File button on the Security Settings dialog toolbar.
Or delete digital ID file in computer:
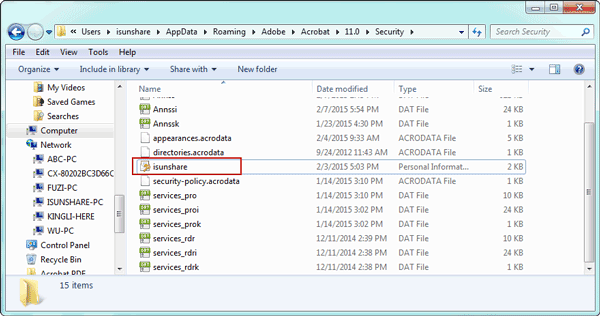
1. Click Start, and open Computer. Turn to digital ID file route.
Generally it is located here: C:\Users\isunshare\AppData\Roaming\Adobe\Acrobat\11.0\Security
2. Find the .pfx file named digital ID. And delete it from computer.
Related Articles:


The article posted was very informative and useful. You people are doing a great job. Keep going.