When it comes to images formats, we would naturally think of JPEG and PNG. As for website editor or front-end developer, choose a right image format not only can ensure image clarity but also improve the website opening speed. If you are a beginner, there is necessary for you to know what is JPEG/PNG and what is difference between them. This short guide will give you a quick rundown to make a better understanding of JPEG/PNG and how to reduce image size of JPEG/PNG without losing quality in Photoshop.
What is JPEG/PNG?
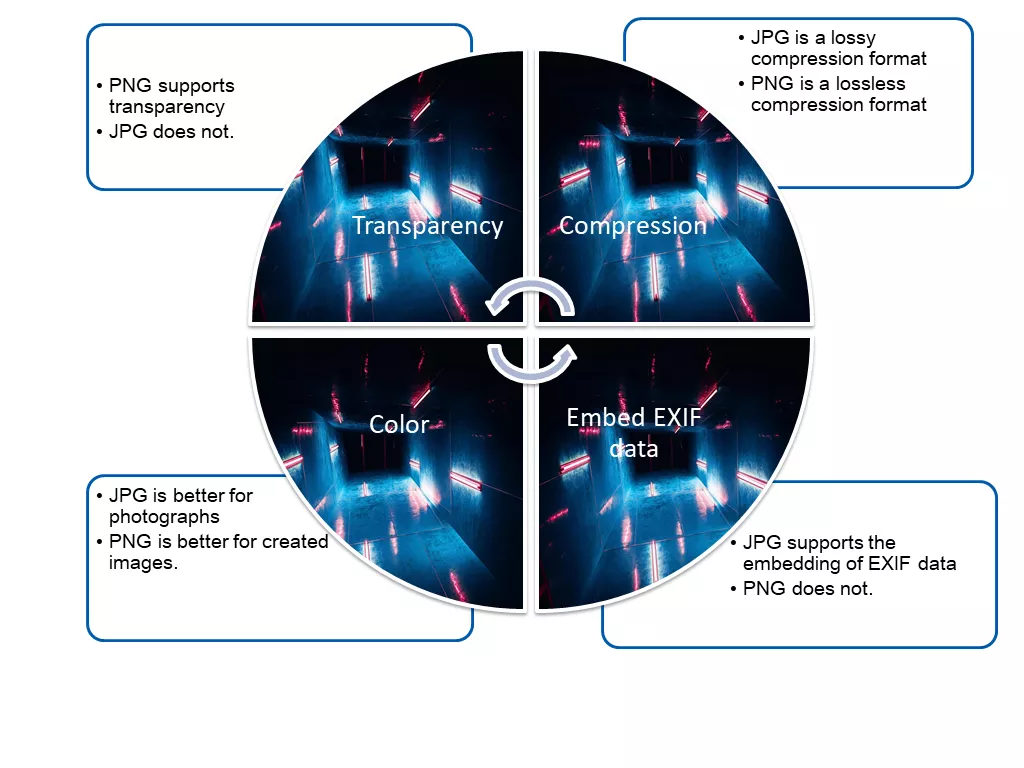
JPEG: Also called JPG, it is a compressed image format. Jpg generally used in colorful pixels pictures which allow slight distortion; however, it’s not appropriate for photos with monotonous colors. The photo format taken by the camera is JPEG.
PNG: A lossless compression image format. It is fit for monotonous colors of pictures and acknowledged as the most fitness of network picture format.
How to Reduce Image Size of JPEG/PNG without Losing Quality in Photoshop
In sometimes, you will find the size of the image is too large. As a result, we can reduce image size of JPEG/PNG by changing its format. Now that let’s walk through tutorials below to learn about how to Reduce Image Size of JPEG/PNG without losing quality in Photoshop.
Step 1: Launch Adobe Photoshop and open the target picture.
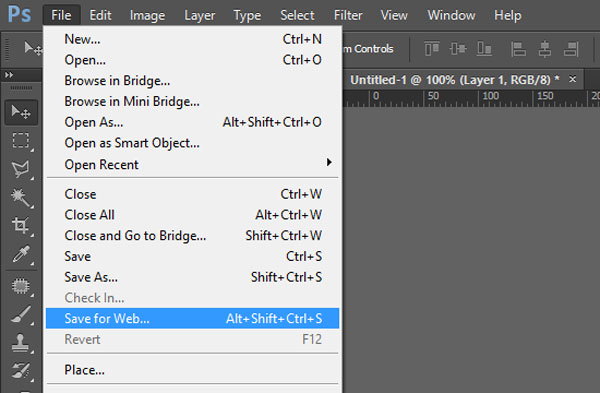
Step 2: Navigate to File > Save for Web.
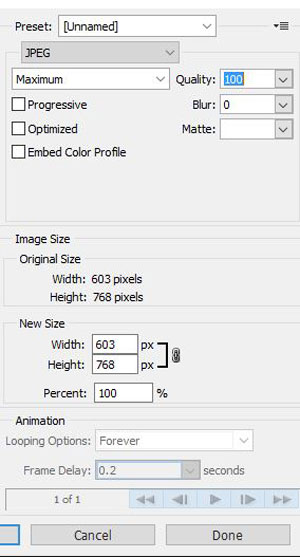
Step 3: In the popup window, select an appropriate format and change other parameters to resize it. When your picture is colorful pixels, select JPEG; otherwise, click on PNG-8 instead.


