Since Windows 8, we can create a virtual machine with Hyper-V. As a newly publish function, it has some unignorable shortcomings while compares to VirtualBox and VMware. Such as Hyper-V needs to configure virtual switch manager to connect to the network and it cannot connect to USB flash disk directly. That’s why most people tend to utilize VMware or VirtualBox instead. Besides, Hyper-V conflicts with VMware and VirtualBox. So, let’s go ahead and get started on how to disable or turn off Hyper-V in Windows 10.
- Option 1: Disable Hyper-V Windows 10 by Control Panel
- Option 2: Turn off Hyper-V Windows 10 via Computer Management
- Option 3: Disable Hyper-V Windows 10 by Command Prompt
- Option 4: Disable Hyper-V Windows 10 PowerShell
Option 1: Disable Hyper-V Windows 10 by Control Panel
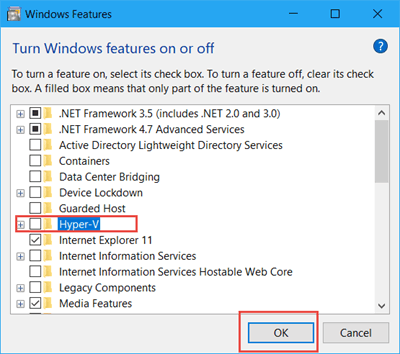
Step 1: Type Turn Windows features on or off in the Windows search bar and hit Enter to open it. Or you can navigate to Control Panel > Program > Turn Windows features on or off.
Step 2: Uncheck the box of Hyper-V and click OK. Restart your computer to disable Hyper-V completely.
Option 2: Turn off Hyper-V Windows 10 via Computer Management
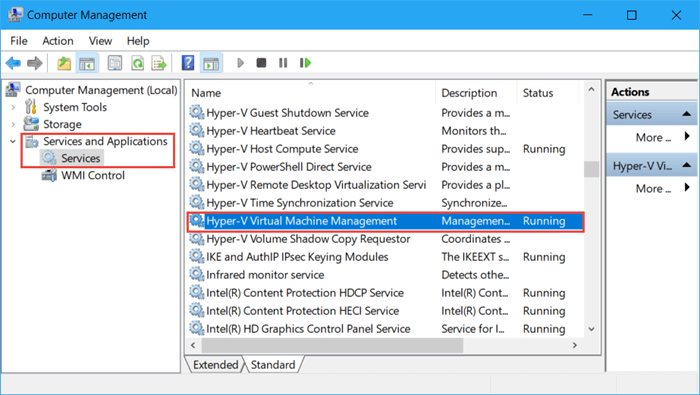
Step 1: Right-click on This PC icon then select Manage.
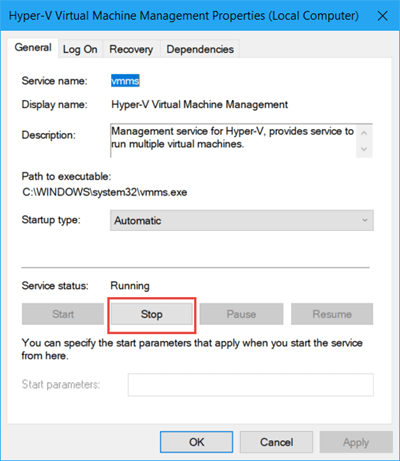
Step 2: In the Computer Management window, expand Services and Applications > Services and double Hyper-V Virtual Management.
Step 3: Tap on Stop button to turn off Hyper-V in Windows 10.
Option 3: Disable Hyper-V Windows 10 by Command Prompt
Step 1: Type cmd in the search bar and Run Command Prompt as administrator.
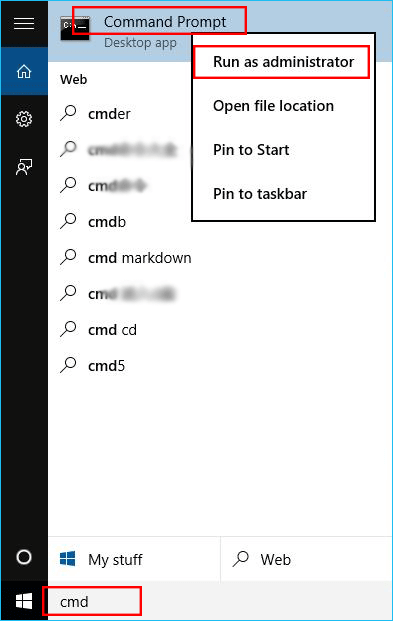
Step 2: Execute the “bcdedit /set hypervisorlaunchtype off” to disable Hyper-V in Windows 10. Restart to take effect.
Note: To enable Hyper-V in Command Prompt, you can run “bcdedit /set hypervisorlaunchtype auto” instead.
Option 4: Disable Hyper-V Windows 10 PowerShell
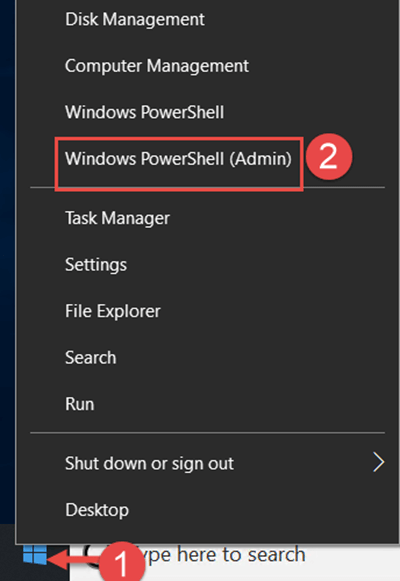
Step 1: Right-click on the Start icon and select Windows PowerShell (admin).
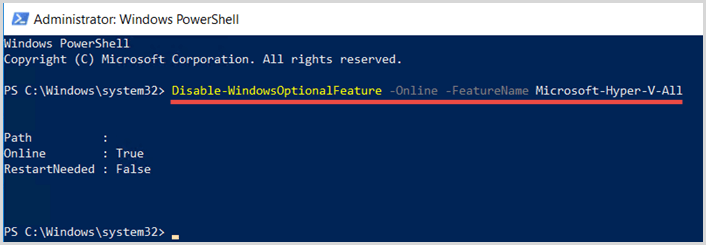
Step 2: Copy the command line below and run it.
Disable-WindowsOptionalFeature -Online -FeatureName Microsoft-Hyper-V-All
Step 3: Reboot Windows 10 to make changes effect.
