Linux Mint is known as the best desktop system for modern, elegant, and comfortable. It combines many advantages of Ubuntu. Many users prefer to switch to Linux Mint because of its ease of use. Burn the Linux Mint ISO into a USB drive to create a Linux Mint bootable USB, which can help you to install Linux Mint and boot it whenever you need it. Check the step-by-step tutorial if you wondering how to a create Linux Mint bootable USB in Windows 10.
- Part 1: Download Linux Mint ISO Image to Your Windows 10 PC
- Part 2: Create a Linux Mint Bootable USB Drive in Windows 10
- Part 3: Access Linux Mint Operating System from a USB Drive
Part 1: Download Linux Mint ISO Image to Your Windows 10 PC
Before creating a Linux Mint bootable USB drive in Windows 10, you need to download a Linux Mint ISO image file to your Windows 10 PC. (If you already have a Linux Mint ISO image, just move to part 2)
Step 1: Download 64-bit Linux Mint. Please note that the Linux Mint file is a torrent file rather than an ISO file.
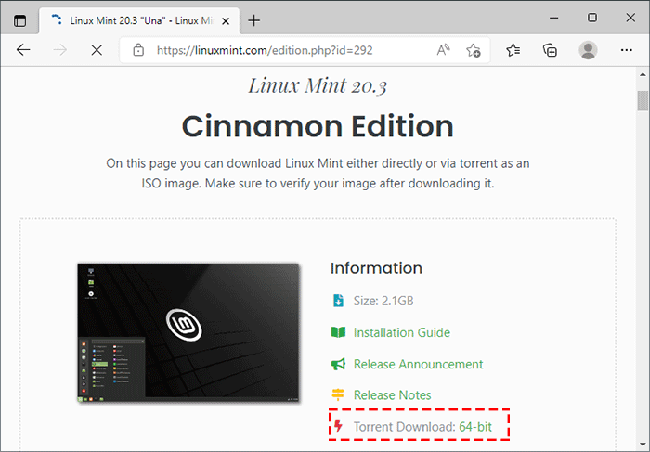
Step 2: Download qBittorrent Windows x64.
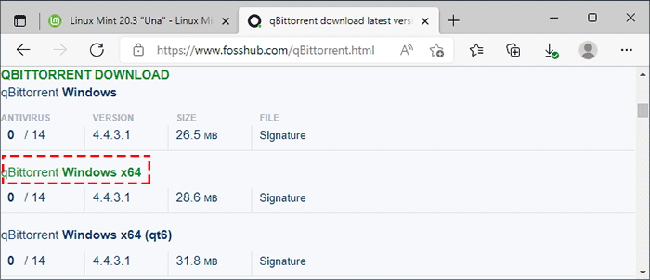
Step 3: Continue to install the qBittorrent and open it.
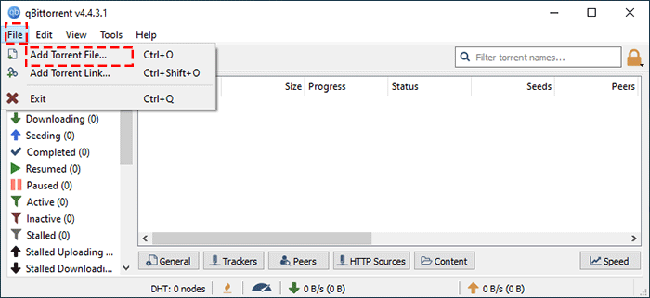
Step 4: After opening it, click File>Add Torrent File… to add the qBittorrent Torrent file to it.
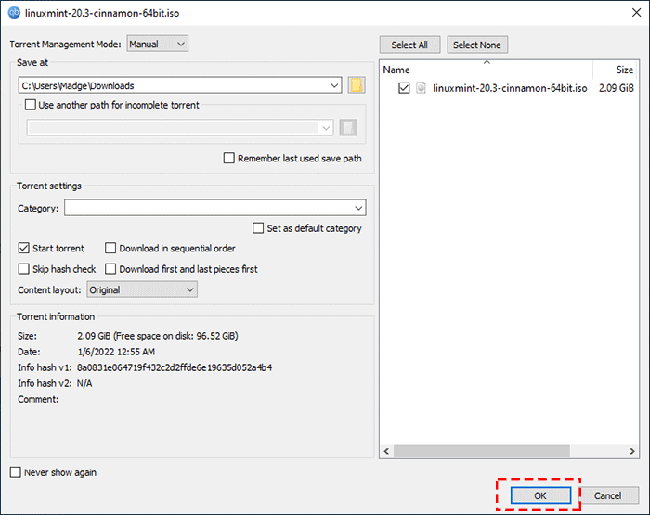
Step 5: Continue to click OK.
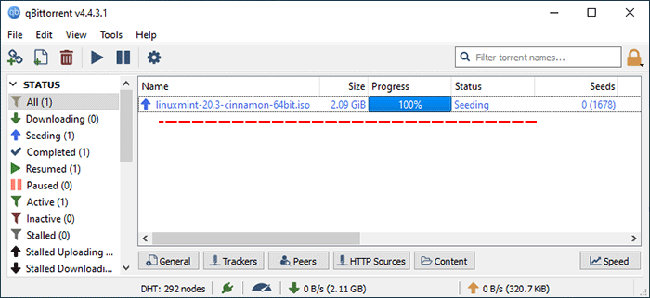
Step 6: Now qBittorrent start downloading the Linux Mint ISO image.
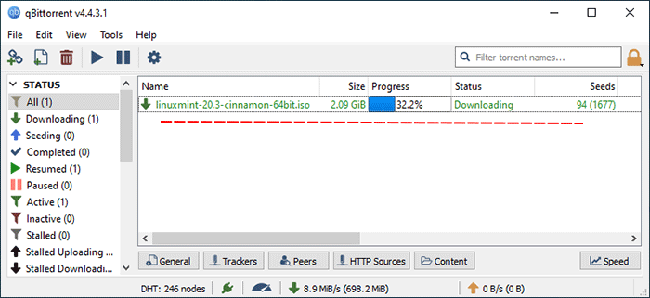
Step 7: The Linux Mint image is fully downloaded and you can see the Linux Mint iso file in the Downloads folder.
Part 2: Create a Linux Mint Bootable USB Drive in Windows 10
- Way 1: Create a Linux Mint Bootable USB Drive using iSunshare ISO Genius
- Way 2: Create a Linux Mint Bootable USB Drive with Rufus
- Way 3: Create a Linux Mint Bootable USB Drive from Command Prompt
Way 1: Create Linux Mint Bootable USB Drive using iSunshare ISO Genius
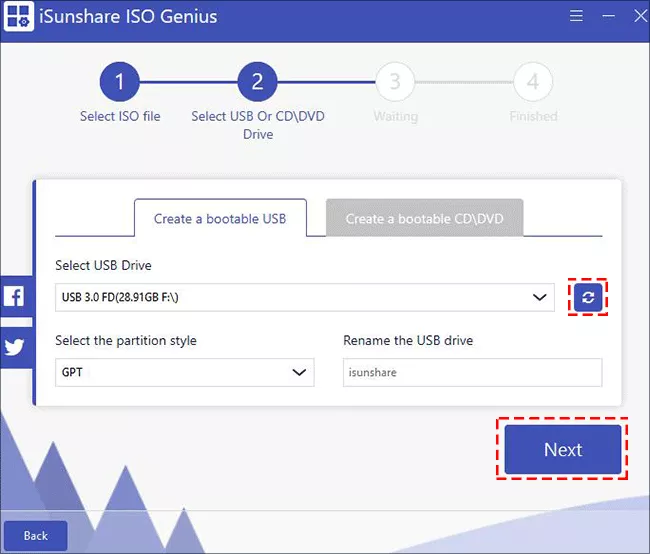
To create a Linux Mint bootable USB drive in Windows 10, you can use iSunushare ISO Genius, which is both free and secure software to create bootable USB drives for Windows and Linux. So, you can try this tool to burn a Linux Mint ISO image to a USB drive on your Windows 10 PC. Here’s how:
Step 1: Free download iSunshare ISO Genius and install it to your Windows 10 computer, then run the program.
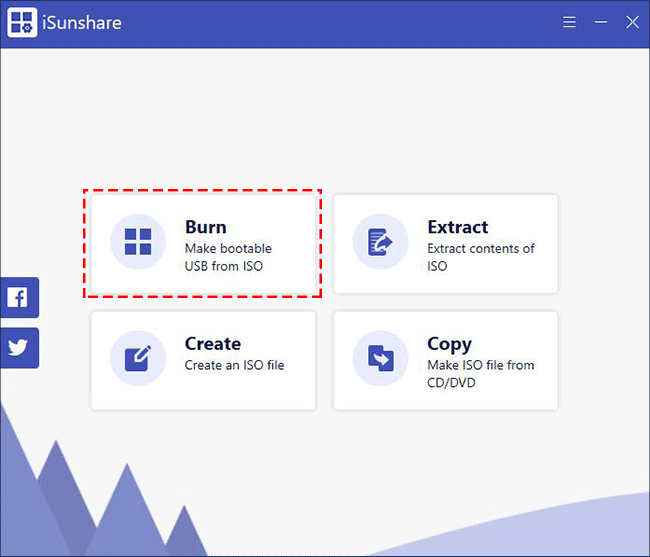
Step 2: Click Burn on the toolbar to start.
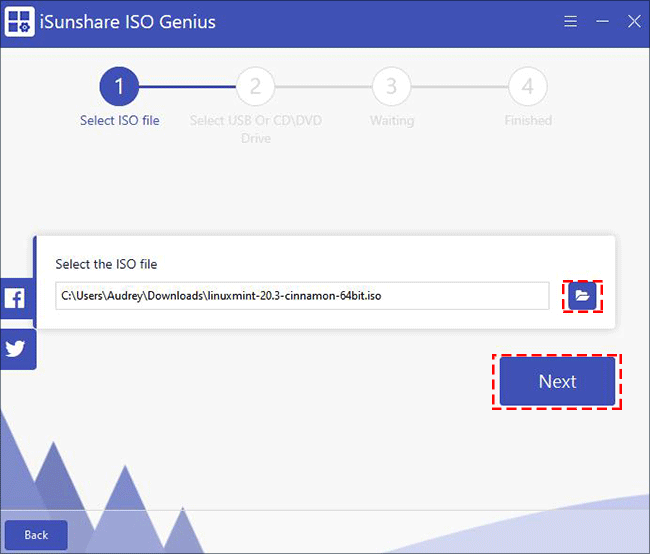
Step 3: On the next page, you need to select the downloaded Linux Mint ISO file.
Step 4: Make sure you have inserted a USB flash drive (here we recommend you use a USB drive larger than 4 GB) into the slot of your Windows 10 PC.
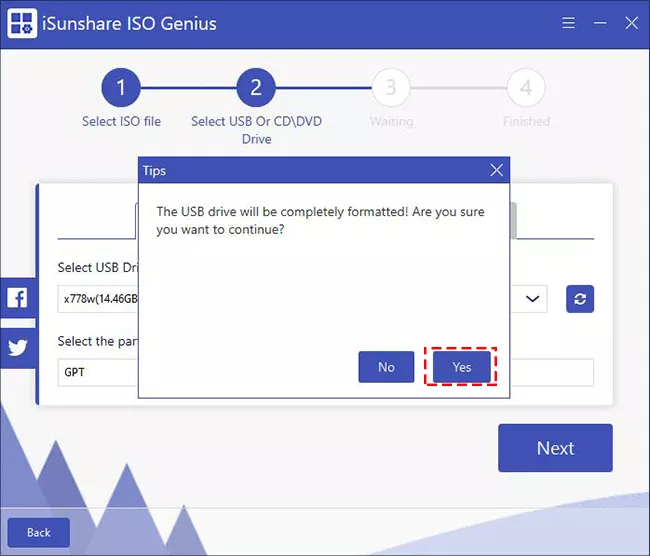
Step 5: Then a dialog will pop up prompting you that the USB drive will be formatted. Click Yes to continue.
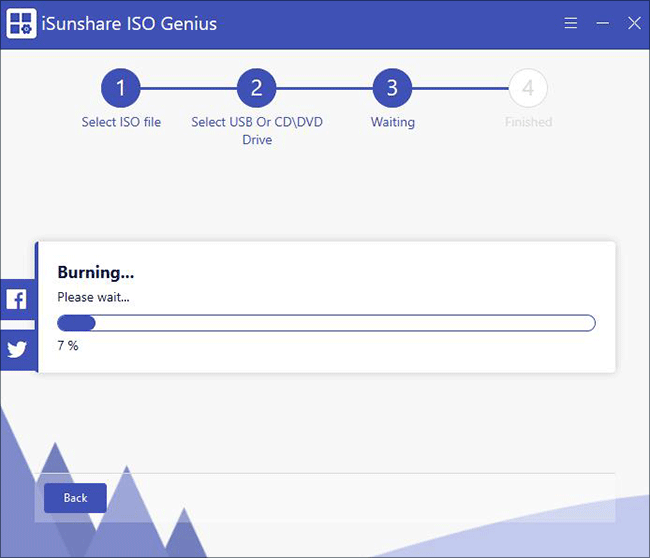
Step 6: Now, wait for iSunshare ISO Genius to burn the Linux Mint iso image to the USB drive.
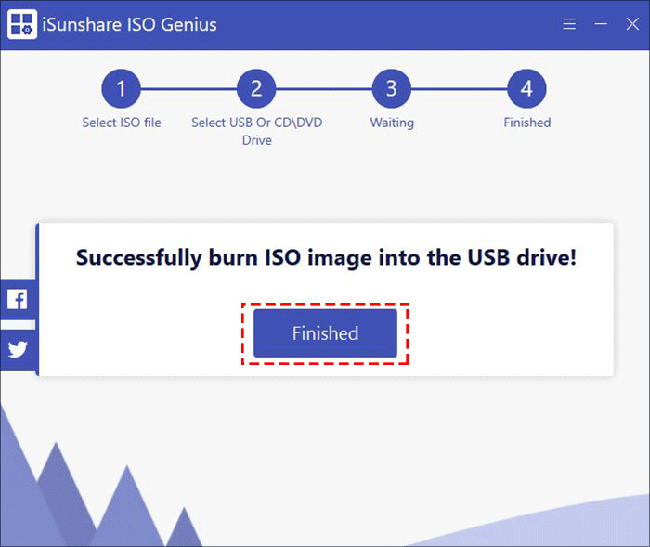
Step 7: Once the Linux Mint bootable USB drive is successfully created, click Finished to complete.
Way 2: Create Linux Mint Bootable USB Drive with Rufus
Rufus is another freeware that lets you burn ISO to USB to create a Linux Mint bootable USB flash drive. Follow the steps listed below to learn how to create a Linux Mint bootable USB drive in Windows 10 with Rufus.
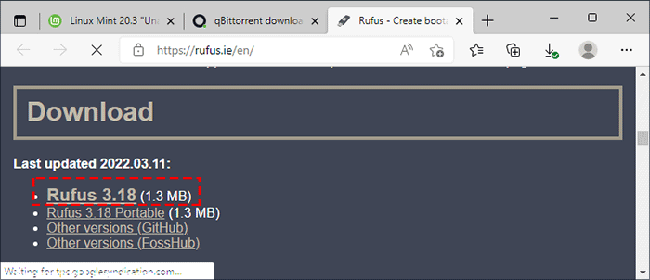
Step 1: Download Rufus 3.18 to your Windows 10 PC and open it.
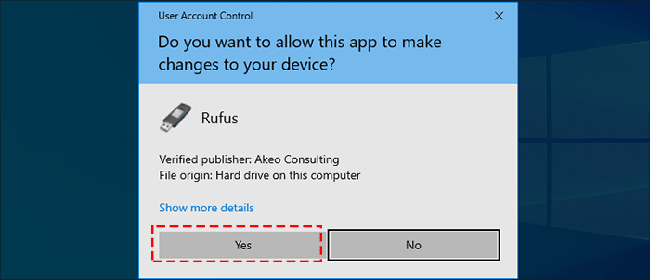
Step 2: Click Yes to allow this app to make changes to your device.
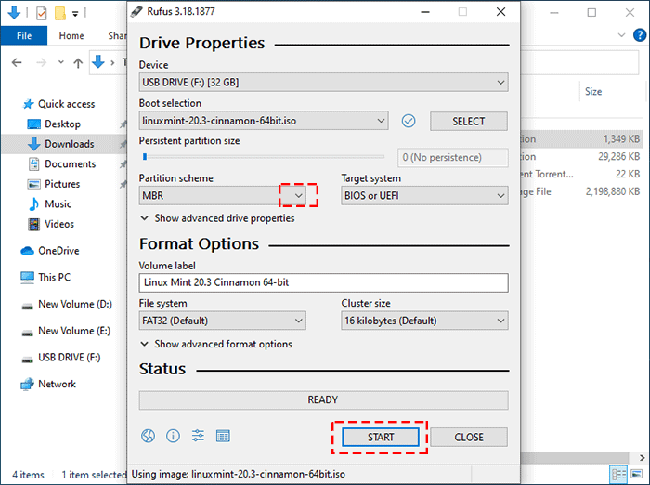
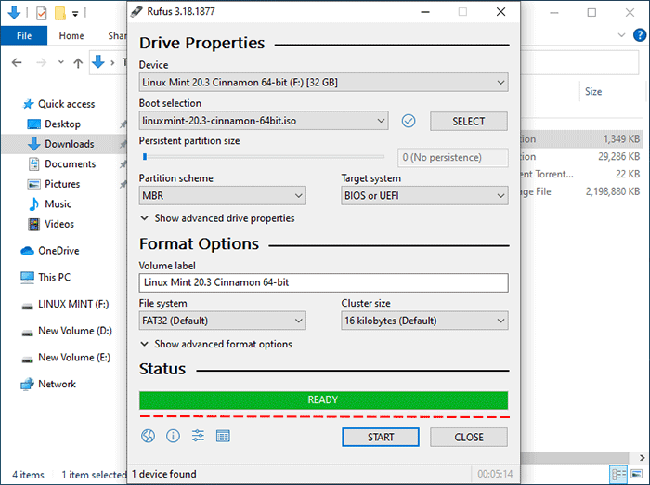
Step 3: Select the USB drive and click on SELECT to select the Linux Mint ISO image.
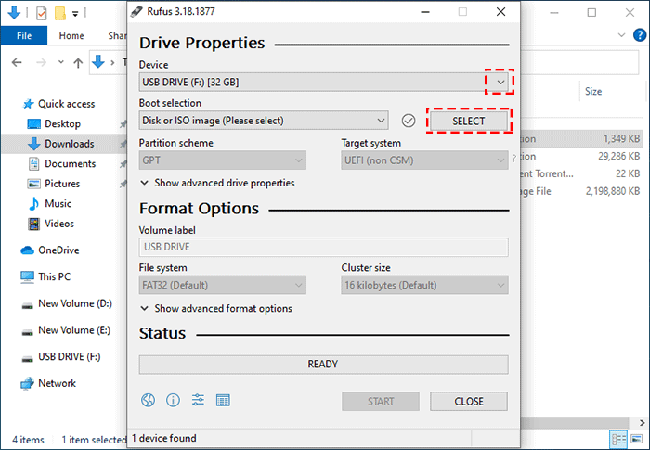
Step 4: Select the partition scheme. It is recommended to choose the format of MBR+FAT32, which will support both UEFI and BIOS booting, and has better compatibility. Then click START to continue.
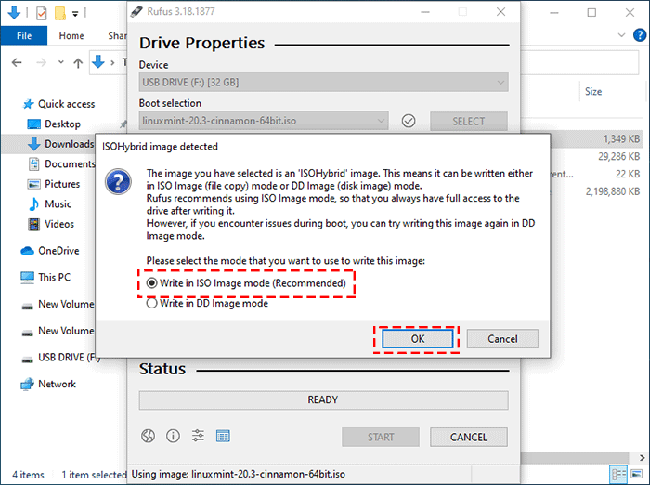
Step 5: Select Write in ISO Image mode(Recommended) and click OK.
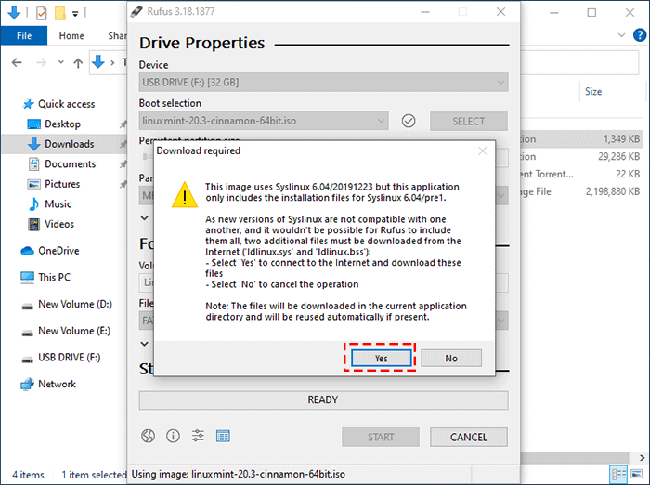
Step 6: Click Yes to continue.
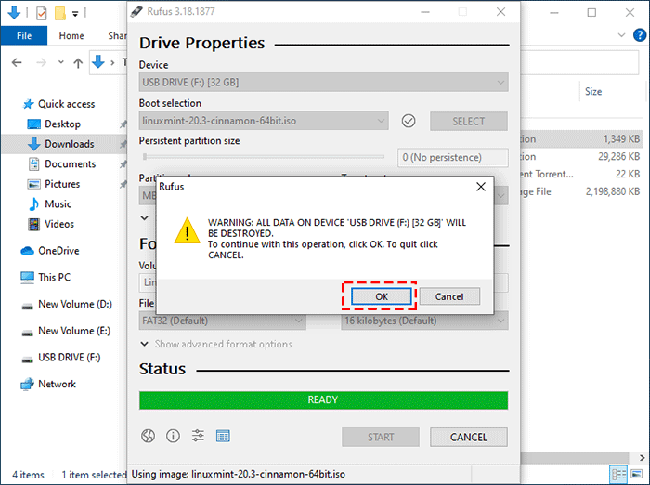
Step 7: Next, a prompt will appear that all data on the USB drive will be destroyed, click OK to start creating a Linux Mint bootable USB drive.
Step 8: Once the Linux Mint ISO is fully burned and copied, a Linux Mint bootable USB can be successfully created.
Way 3: Create a Linux Mint Bootable USB Drive from Command Prompt
- Step 1: Mount Linux Mint Image and Make Preparation
- Step 2: Run Command Prompt to Format USB Flash Drive
- Step 3: Copy Linux Mint Image contents to your USB flash drive and make it bootable
- Step 4: Add configuration text to the USB flash drive
Step 1: Mount Linux Mint Image and Make Preparation
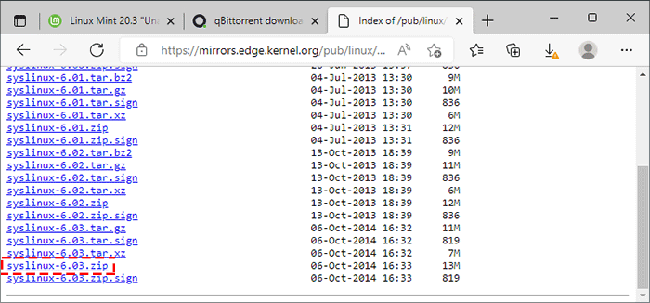
1. Download syslinux-6.03.zip to your Windows 10 computer.
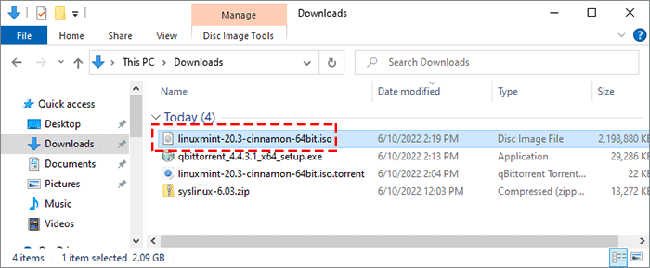
2. Double-click to mount the Linux Mint ISO file.
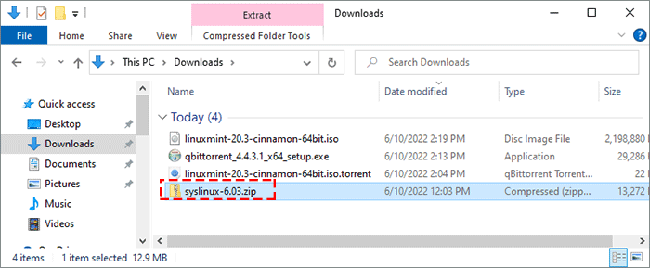
3. Find the downloaded syslinux-6.03.zip file and double-click to open it.
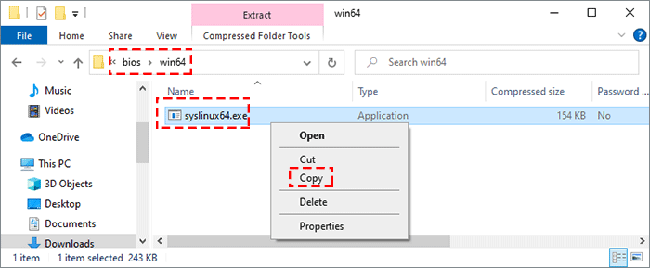
4. Double-click to open the bios>win64 folder, and copy the application name syslinux64.exe to the root directory of D:.
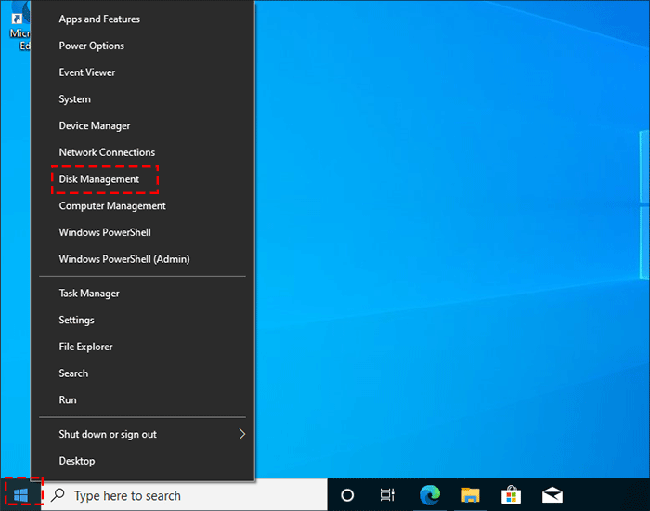
5. Now, plug the USB drive into your computer, right-click on the Start menu to click on Disk Management.
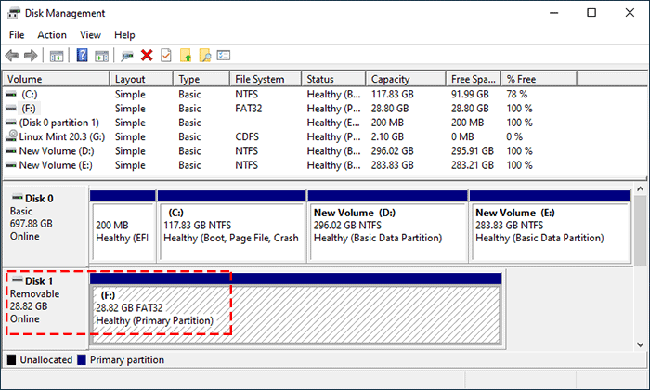
6. You can see that the USB stick is Disk 1.
Step 2: Run Command Prompt to Format USB Flash Drive
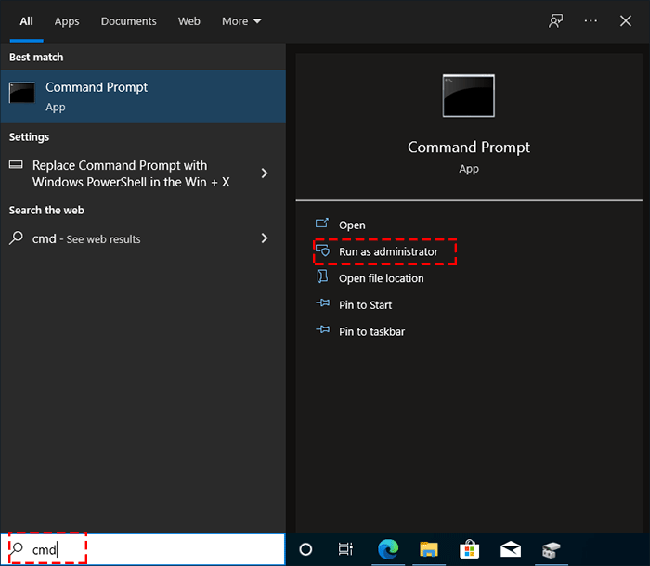
1. Search for cmd on the taskbar and click Run as administrator to open a command prompt.
2. Once the command prompt window opens, type the command diskpart and press Enter. (Use DiskPart to format the USB drive and assign letters. )
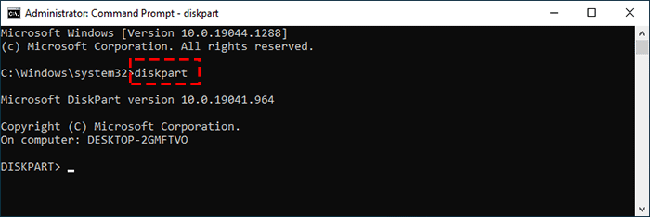
3. Type the command list disk and press Enter, all disk information will be displayed.
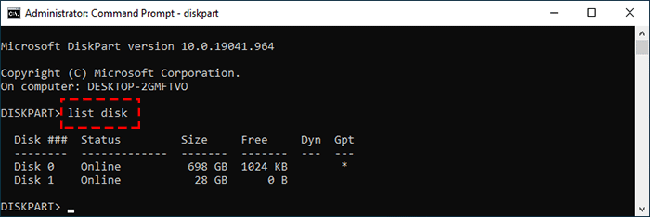
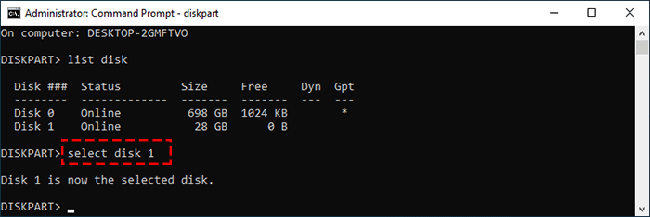
4. Type the command select disk 1 (please note that the U disk is selected here, otherwise other hard disks may be formatted.)
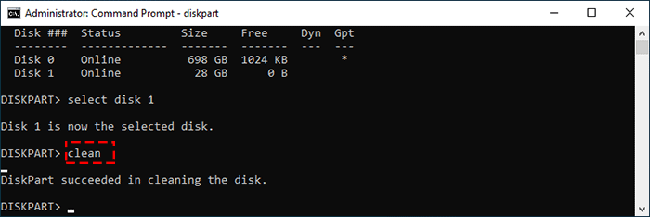
5. Type the command clean and press Enter, all data stored on the USB drive will be erased.
6. Type the command convert mbr and press Enter to convert the disk to MBR format.
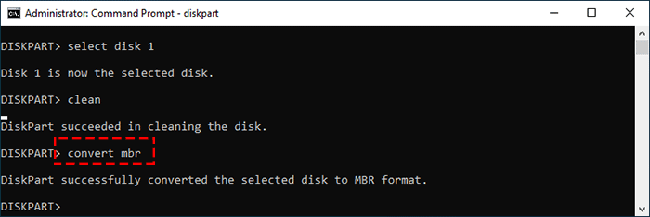
7. Type the command create partition primary and press Enter to create partition primary.
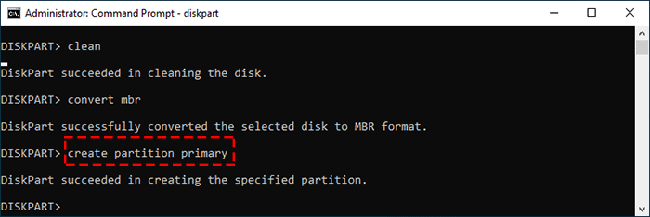
8. Continue to type the command format quick fs=fat32 label=”linux mint” and press Enter to format the volume.
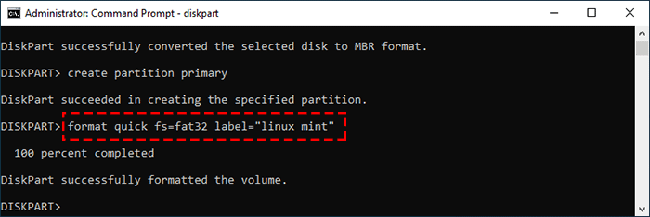
9. Type the command assign letter=X and press Enter to assign the drive letter or mount point.
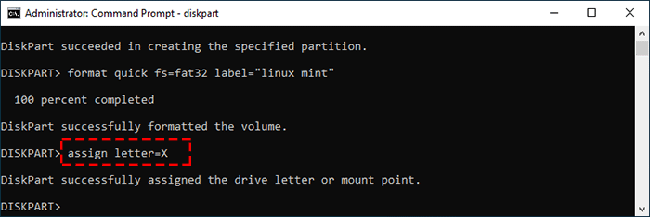
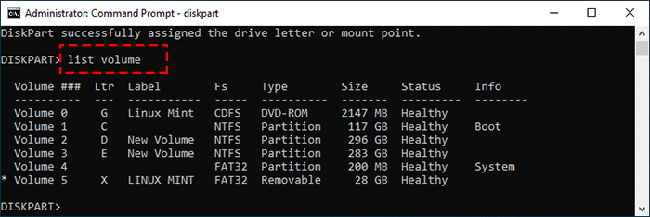
10. Type the command list volume to view the volume information of the disk.
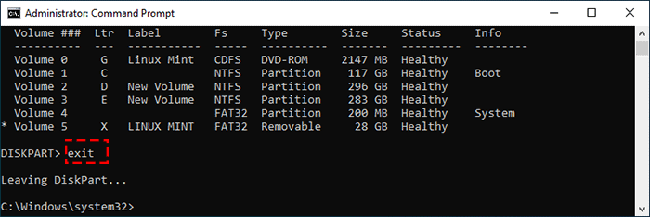
11. Type the command exit and press Enter to exit DiskPart.
Step 3: Copy Linux Mint Image contents to your USB flash drive and make it bootable
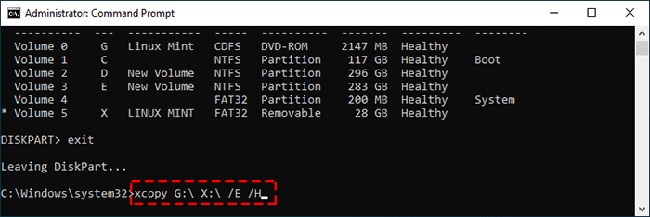
1. Type the command xcopy G:\ X:\ /E /H and press Enter to copy all files and folders in the Linux Mint into the root directory of USB drive and wait until completely copied and pasted.
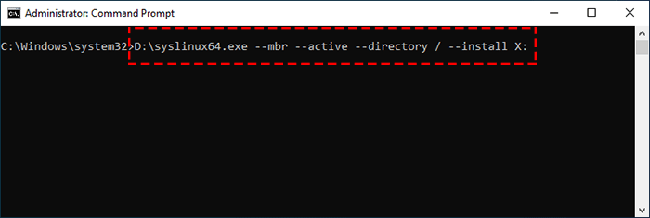
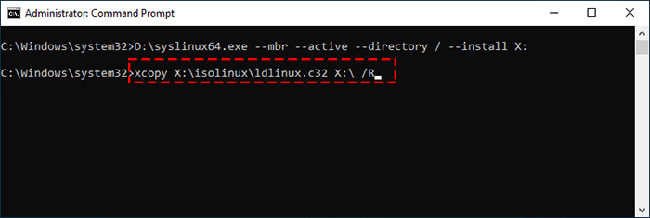
2. Then execute D:\syslinux64.exe –mbr –active –directory / –install X: and press Enter to create a bootable USB drive.
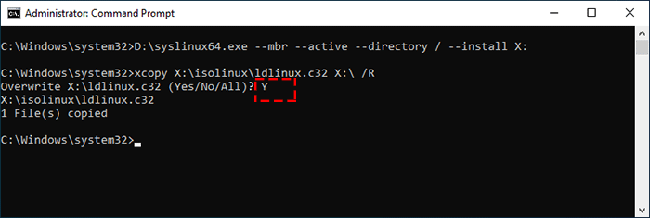
3. Continue to type the command xcopy X:\isolinux\ldlinux.c32 X:\ /R and press Enter.
4. Type Y and press Enter to allow x:\isolinux\ ldLinux. c32 file to replace the ldLinux. c32 file generated by syslinux64.exe stored in the root directory of the USB disk.
Step 4: Add configuration text to the USB flash drive
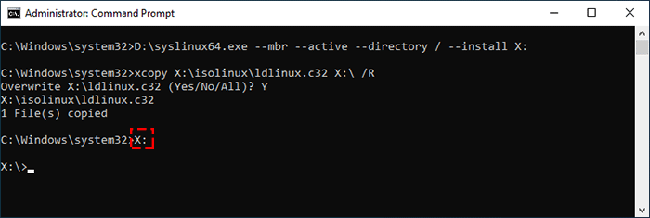
1. Type the command X: and press Enter to access the X disk.
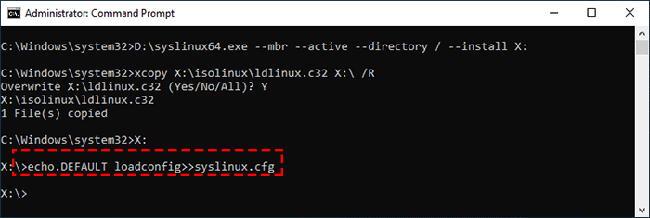
2. Type the command echo.DEFAULT loadconfig>>syslinux.cfg and press Enter.
3. Type the command echo.LABEL loadconfig>>syslinux.cfg and press Enter to continue.
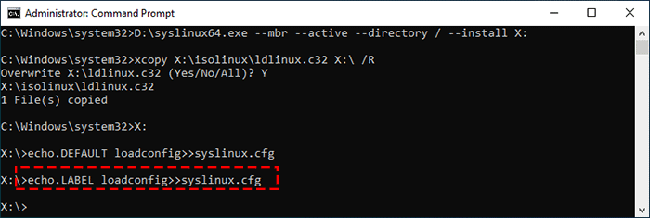
4. Continue to type the command echo.CONFIG /isolinux/isolinux.cfg>>syslinux.cfg and press Enter.
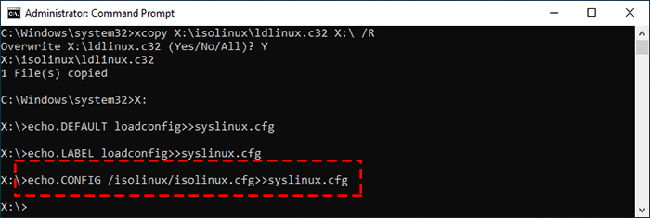
5. Then execute echo.APPEND /isolinux/>>syslinux.cfg and press Enter.
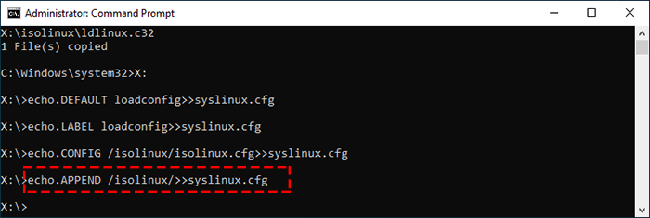
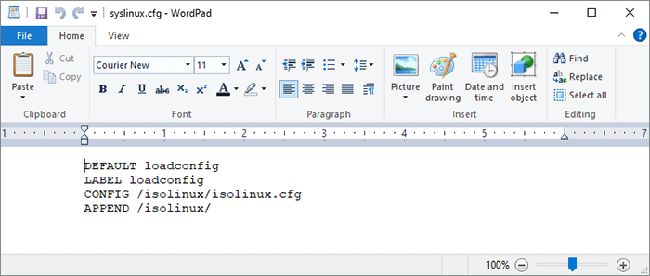
6. Last, type the command syslinux.cfg to view the contents of syslinux.cfg configuration text.
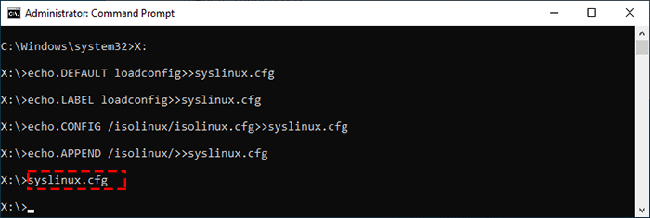
7. The syslinux.cfg configuration text is shown in the following figure.
Part 3: Access Linux Mint Operating System from a USB Drive
After creating a Linux Mint bootable USB drive, you can go to start up from the USB drive.
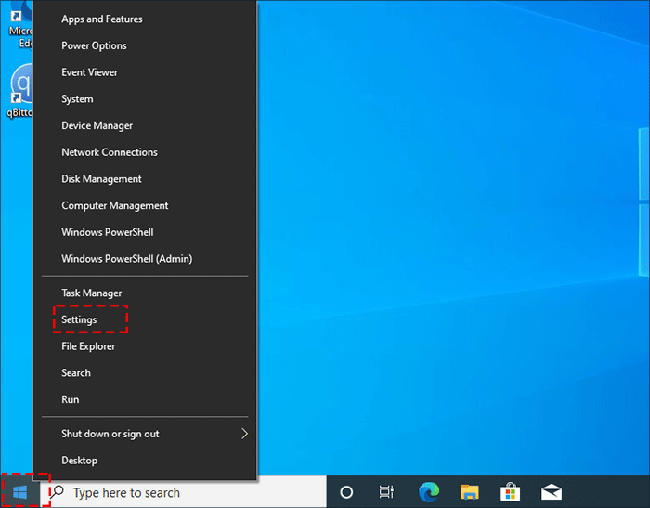
Step 1: After plugging the USB drive into the computer, right-click the Start menu and click Settings.
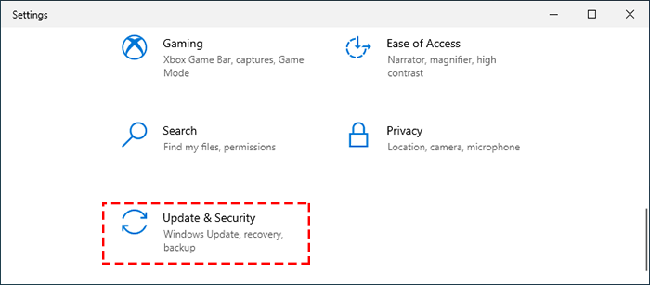
Step 2: Click Update & Security.
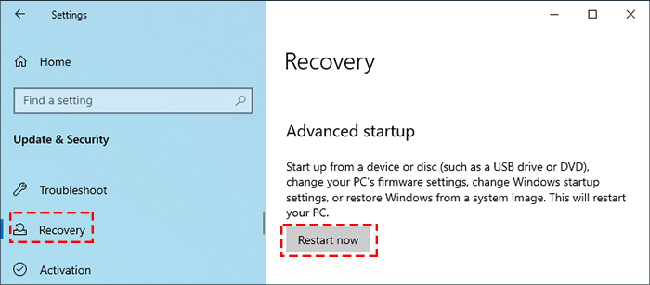
Step 3: Click on Recovery on the left pane and click on Restart now on the right pane.
Step 4: Choose the Use a device option.
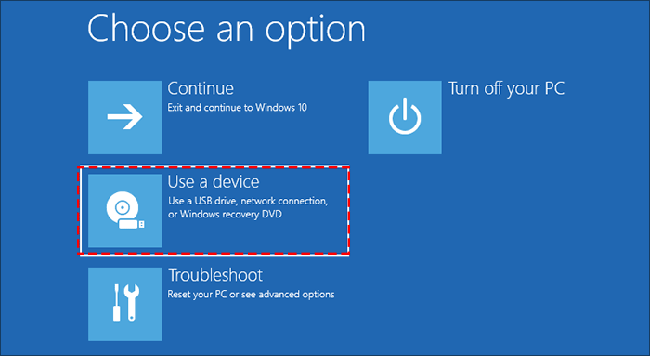
Step 5: Click the USB device.

Step 6: After restarting, open the Start Linux Mint 20.3 Cinnamon 64-bit option.

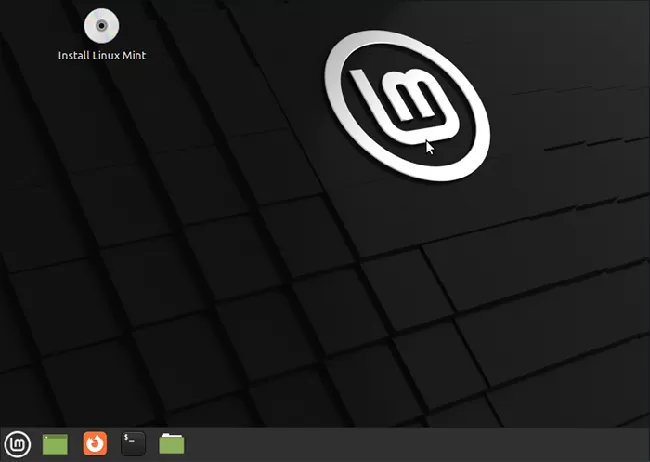
Step 7: Then you access the Linux Mint Operating system interface.
Tips: You can check the details in the video tutorial: https://www.youtube.com/watch?v=nCzCFuXPZnQ
Related Articles:

