It is well known that the Windows registry contains the whole configuration settings for the computer, for example, the overall performance of the system and your software. There is no doubt that the registry plays a significant role in maintaining the good performance of your computer. But it will also create a great number of unused and invalid registry entries which slows down the PC performance. Is it possible to clean out those registry files in my computer? Yes, you can remove those invalid registry entries in Windows computer with the registry cleaner safely.
iSunshare System Genius –Registry Cleaner for Free Download
For the common people, it is difficult for them to find the invalid registry files in the computer. Not to mention cleaning out them to speed up the computer. So it is necessary to have a professional and safe registry cleaner on Windows computer. iSunshare System Genius is the easy-to-use invalid registry cleaner for Windows 10/8/7 computer. It supports 32 bit and 64 bit Windows laptop as well as desktop computer (Dell/Asus/Samsung/Lenovo/HP/ Acer etc.)
With System Genius, you can not only remove the invalid registry entries from the computer, but also clean up the junk files with several clicks. Therefore, you can utilize this registry cleaner to free up space from time to time.
How to Remove Invalid Registry Files from Windows Computer
In the following, we will introduce how iSunshare System Genius works to clean invalid registry files.
Step 1: Free download the software from the official website and install it on your Windows 10/8/7 computer.
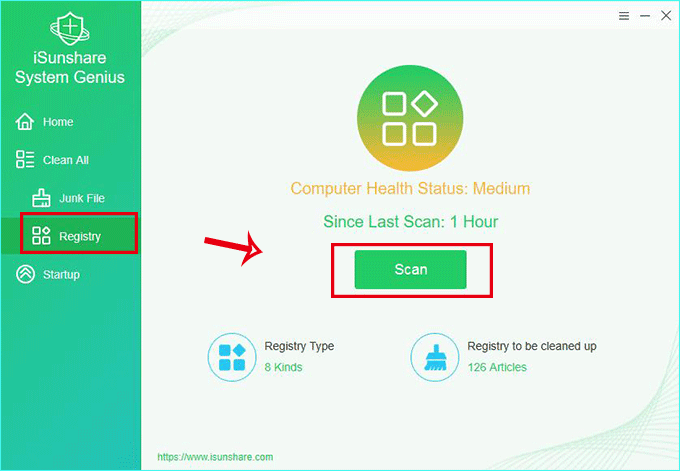
Step 2: Start the software and click Registry in the interface. Then go to the right menu and click Scan to checkup invalid registry files on your computer.
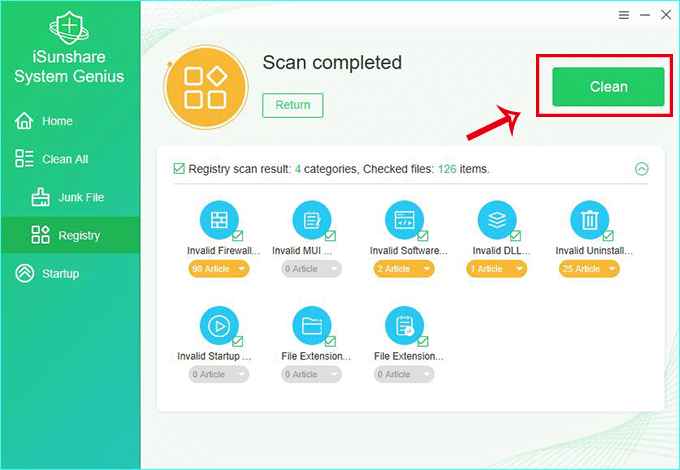
Step 3: After scanning completes, all the invalid registry files are shown in the result. You can click Clean to remove the unwanted registry entries from your computer.
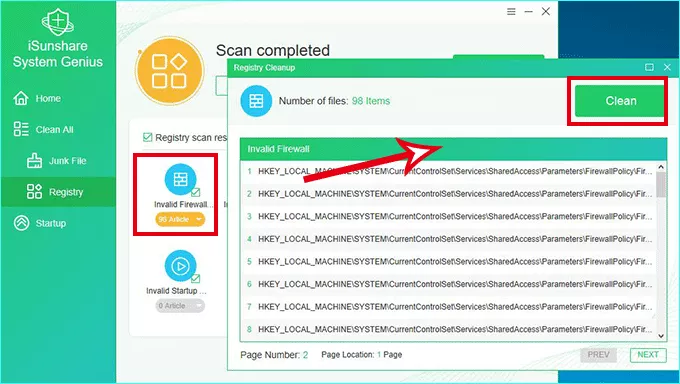
Tips: iSunshare System Genius allows you to delete the registry one by one. You can tick the one that you want to clean and get more details. Then you can know its actual location and click Clean to remove them.
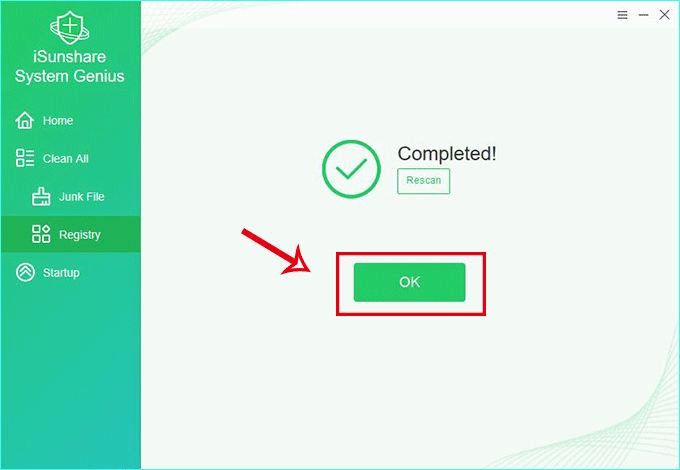
Step 4: Click OK and the whole process ends. You can repeat this operation weekly.
You can view the video tutorial here: https://www.youtube.com/watch?v=zS467tshnyg
Related Articles:
