Does MacOS provide any drive-encryption function just like Windows OS which supports password protecting drives with BitLocker? The answer is positive yes. You can freely password protect your USB flash drive in MacOS’s Finder or Disk Utility and here are the detailed ways to encrypt a USB flash drive on Mac.
1. Encrypt a USB Flash Drive via Finder
Step 1: Insert your USB flash drive into Mac and then access Finder![]() .
.
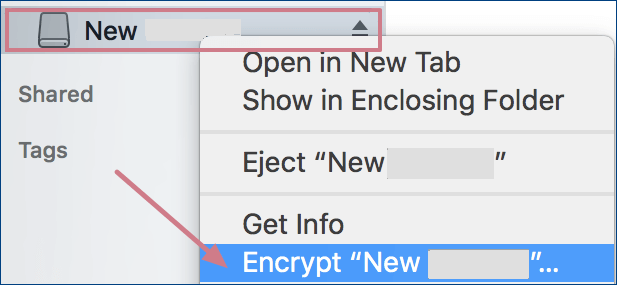
Step 2: In the Finder sidebar, right-click the USB flash drive and choose Encrypt XXX in the context menu.
Tips: If you cannot find the Encrypt XXX option, you need to password protect your USB drive with Disk Utility.
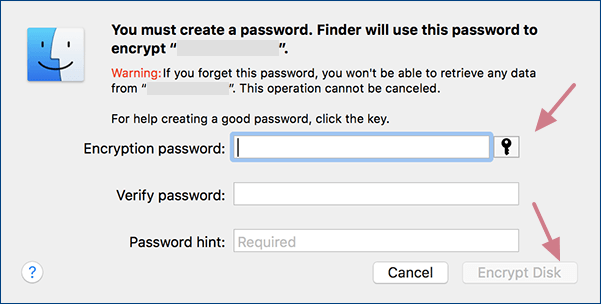
Step 3: In the pop-out window, enter an encryption password and re-enter it to verify your password. You also need to input a password hint. Then click Encrypt Disk to start the encryption process.
2. Encrypt a USB Flash Drive with Disk Utility
Before you apply this way to put a password on your USB flash drive on Mac to protect your USB device, you have to copy your USB drive’s data to another safe storage volume because it will erase the USB drive firstly.
Step 1: Connect your USB flash drive to Mac and run Disk Utility![]() . After that, choose your USB flash drive in the left pane.
. After that, choose your USB flash drive in the left pane.
Step 2: Click Erase![]() in the upper toolbar.
in the upper toolbar.
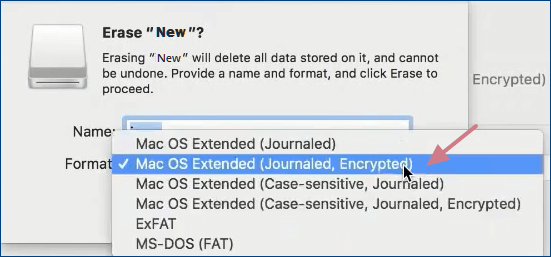
Step 3: Create a new name for your USB drive or not. In the Format option, select Mac OS Extended (Journaled, Encrypted).
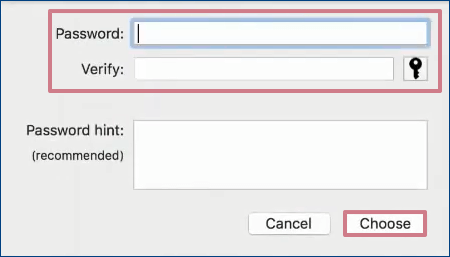
Step 4: Input a password to encrypt your USB drive and then enter the password again to verify it. To move on, click Choose. At last, hit Erase and your USB flash drive will be formatted and encrypted instantly.
Tips: After the process is finished, you can move your important data to the encrypted USB drive for data protection.
Related Articles: