If you want to add the last Intel AHCI driver to Windows 7 PE disk, this article will introduce how to use DISM command and other commands to make your thought come true.
Steps to add last Intel AHCI driver to Windows 7 PE disk:
1. Download the latest Intel AHCI Driver in the following link, and unzip it to a folder.
https://downloadcenter.intel.com/confirm.aspx?httpDown=http://downloadmirror.intel.com/22194/eng/f6flpy-x86.zip&lang=eng&Dwnldid=22194
2. Run “Deployment Tools Command Prompt” as administrator. You can follow “Start→All Programs→Deployment Tools Command Prompt→Right click it and choose Run as administrator”.
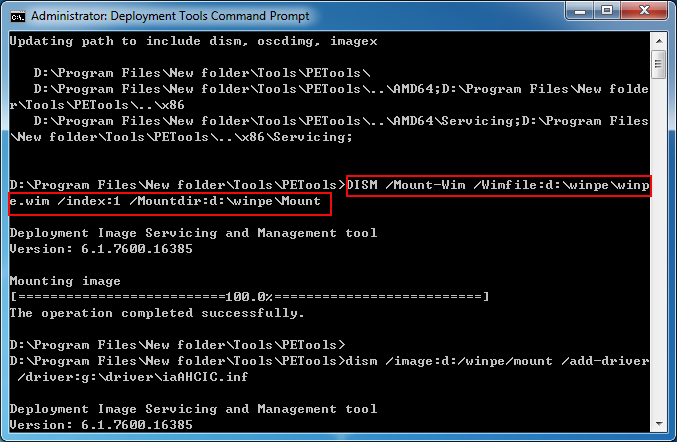
3. Use DISM Command to mount windows 7 PE wim image to a folder. That is, type DISM /Mount-Wim /Wimfile:d:\winpe\winpe.wim /index:1 /Mountdir:d:\winpe\Mount in “Administrator: Deployment Tools Command Prompt” run box and press Enter, as the following screen shows.
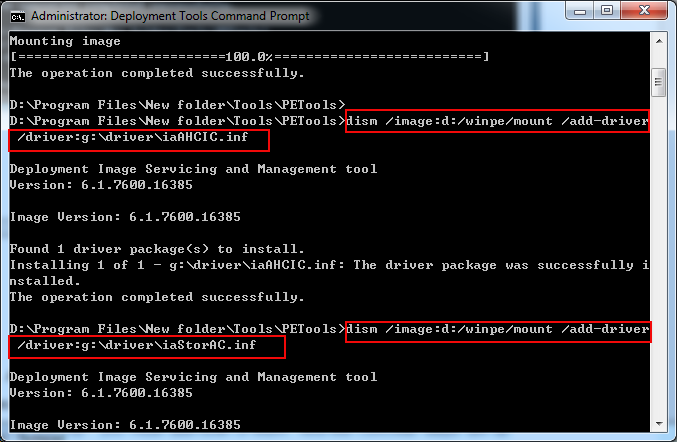
4. Add last Intel AHCI driver to mount folder. In this step, because there are two setup inf files named “iaAHCIC.inf” and “iaStorAC.inf” in the “f6flpy-x86.zip”, so you must add both of them. And the concrete steps are as follows. Firstly, type dism /image:d:/winpe/mount /add-driver /driver:g:\driver\iaAHCIC.inf and press Enter. Secondly, type dism /image:d:/winpe/mount /add-driver /driver:g:\driver\iaStorAC.inf and hit Enter. You can refer to the red boxes in the picture below.
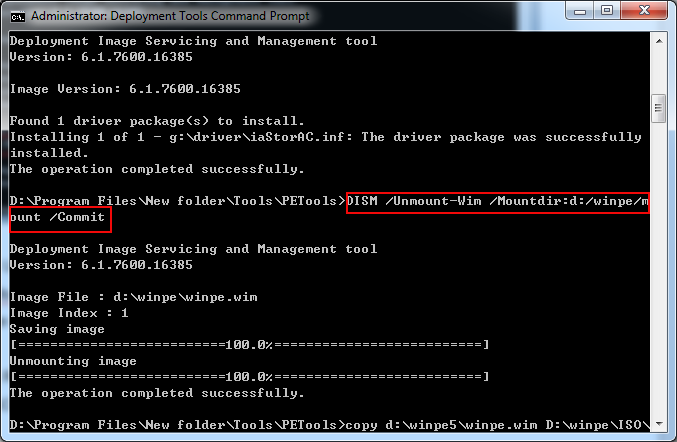
5. Unmount the Windows 7 PE wim image by typing in DISM /Unmount-Wim /Mountdir:d:/winpe/mount /Commit, as the following screen shot exhibits.
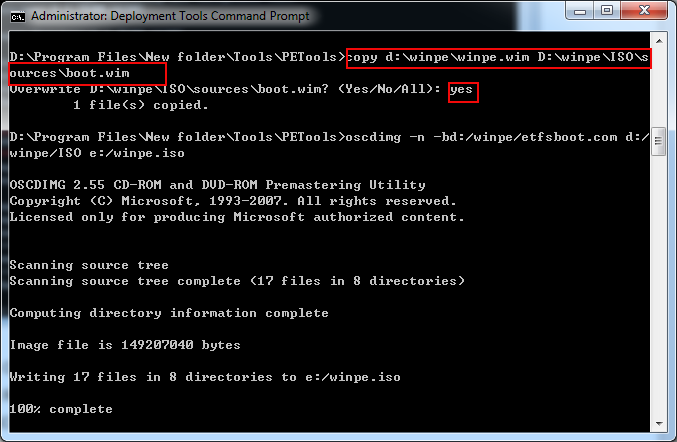
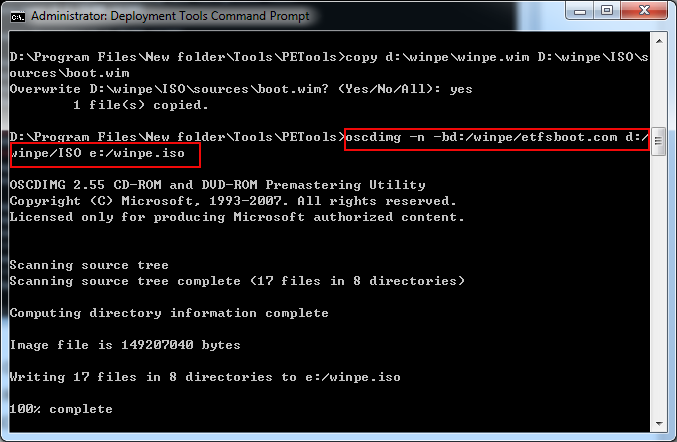
6. Copy winpe.wim to the sources folder as boot.wim by inputting copy d:\winpe\winpe.wim D:\winpe\ISO\sources\boot.wim. When the question “Overwrite D:\winpe\ISO\sources\boot.wim?” shows up, input yes.
7. Use oscdimg command. That is, type in oscdimg -n -bd:/winpe/etfsboot.com d:/winpe/ISO e:/winpe.iso and click Enter.
After the 7 steps, the last Intel AHCI driver is successfully added to Windows 7 PE disk.
Related Articles:
Thanks, it is very informative