I think PDF document is familiar to most of us. It is a document format that can be viewed on nearly any devices and operational systems. But sometimes, we have to edit it to make PDF file like what we want. What we can use and how to edit PDF document?
See following introduction about using Word 2013 and Adobe Acrobat to edit PDF document.
Part 1: How to Edit PDF Document in Word 2013
As is known, we can save a Word file to PDF format in Word 2007 or later. And Word 2013 is the first version that allows you to open a PDF file, edit it and resave it as a PDF.
Step 1: Open PDF File with Word 2013.
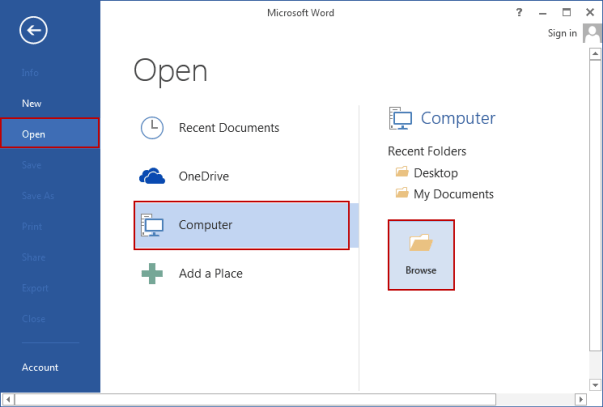
Using Word 2013, you can now open and edit a PDF file. You’ll do so as you would any other file. To open a PDF file using Word 2013, do the following:
1. Choose Open from the left pane.
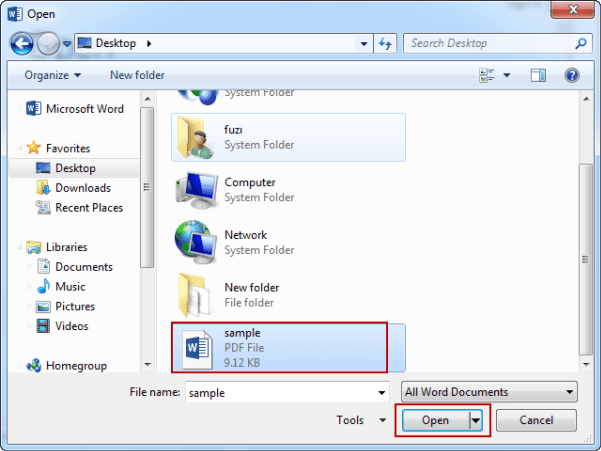
2. Use Recent Documents or your system’s folder structure to find the PDF you want to open. Word will display PDF files in its lists. You don’t have to specify the PDF format to see those files.
3. Select the file and click Open.
4. When Word displays the informational dialog, click OK.
5. If Word displays the Protected View bar at the top of the document, click Enable Editing.
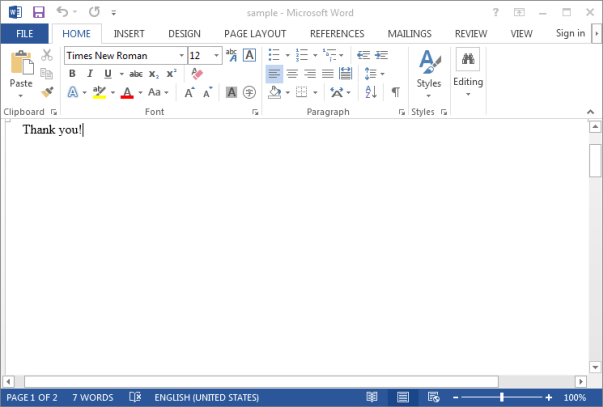
6. It will show the results of opening a previously blank PDF file and adding a bit of text. If you open this file using Adobe Reader, you can’t edit the file. To edit the file, you’d need Adobe Acrobat.
Surely, you can open and edit PDF file with Word 2013. But not every format and feature will transfer perfectly, so you’ll want to check the document carefully before saving your changes. When you find there are many difficulties appearing during the editing process, please save PDF file as a Word .docx file. Then, close and reopen Word .docx file in Word 2013. So, interpreting the PDF elements as Word elements sometimes seems to improve the conversion.
Step 2: Save PDF File.
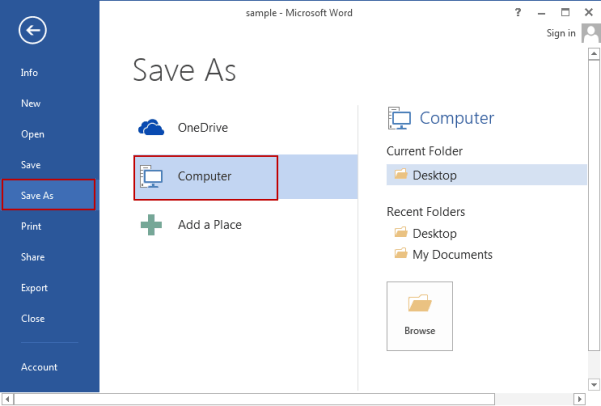
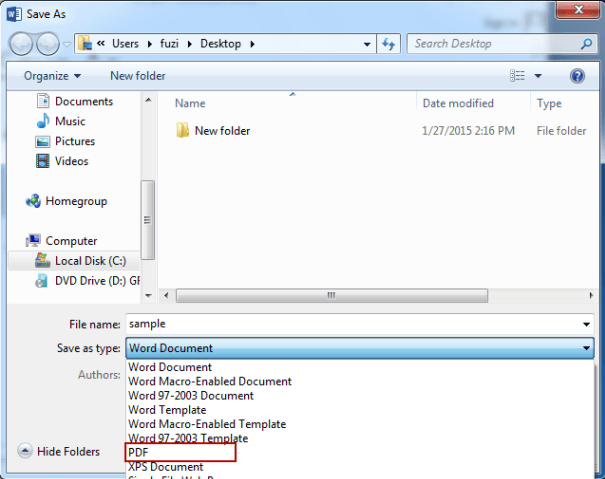
After editing the file, you can save this file as Word document or as a PDF file. When you save the file, Word will default to its format (.docx), so let’s walk through the steps necessary to save the edited file to the PDF format.
1. Click the File tab and choose Save As.
2. Choose a location for the new file.
3. When Word displays the Save As dialog, you’ll notice that it has default to its format. From the Save As Type drop-down, choose PDF.
4. Word will retain the document’s author, so you might want to delete or change that option.
5. Click Save.
Part 2: How to Edit PDF Document in Adobe Acrobat
If your computer has been installed with Adobe Acrobat Pro, it will be the best tool to edit PDF document containing text and images.
Step 1: Open PDF document in Adobe Acrobat.
Right click the PDF document you want to edit, and open it with Adobe Acrobat.
Step 2: Edit PDF Document.
With following three methods, you will be able to edit PDF document.
Method 1: When you prepare to open and edit PDF document, right click the document you want to edit, and choose Edit with Adobe Acrobat.
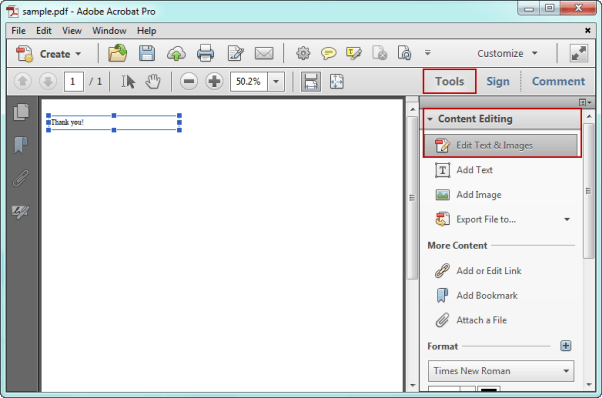
Method 2: After opening PDF in Adobe Acrobat, click Tools in the top-right side of PDF document, and choose Content Editing – Edit Text & Images.
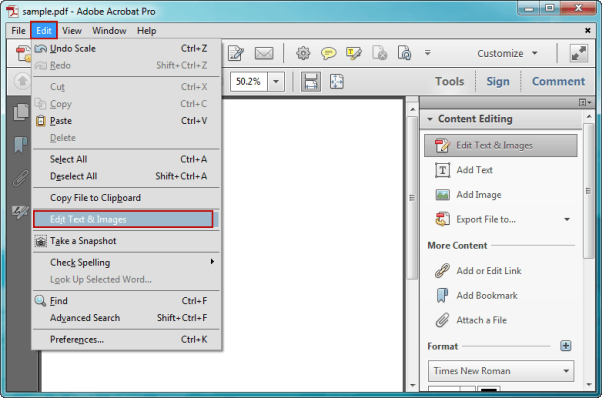
Method 3: Click Edit menu and choose Edit Text & Images.
Now you can choose the paragraph or picture you want to change or edit. With “Add Text” and “Add Image“, you can also add new text or image into PDF. Besides, PDF document font size, color etc can be changed too. Compared to Word 2013, Adobe Acrobat makes PDF editable surely for users, but not as flexible as Word 2013.
Step 3: Save PDF document.
Besides Adobe Acrobat and Word 2013, Foxit PDF Editor is another tool that can edit PDF file. But it is not so easy to use like Word 2013 and Adobe Acrobat. So it won’t be introduced here.
Related Articles:
