If you have a Samsung Galaxy phone, you may encounter the error message which is “Unfortunately Samsung Galaxy Store has stopped”. Troubleshooting this problem is not that difficult but it is a bit time-consuming. Therefore, we have selected 5 ways to help you fix the problem efficiently.
- 1: Clear data and cache of Galaxy Store
- 2: Reset app preferences
- 3: Wipe cache partition
- 4: Fix system problems through Android Repair Genius
- 5: Perform a factory reset
1: Clear data and cache of Galaxy Store
This is the most direct way to fix the Galaxy Store problem. Clearing the cache won’t affect the data of Galaxy Store and it may fix small errors related to it.
If the cache cleanup could not fix the Galaxy Store error, you can clear the data of it. It is helpful when the bug that causes the error is related to the Galaxy Store. But please note that clearing the data will return the Galaxy Store to its default state. Here are the steps to clear the data or cache of Galaxy Store.
Step 1. Swipe down from the top side of the screen. You can see the Settings icon in the upper right corner of the screen. Tap it.![]()
Step 2. Search for Galaxy Store by clicking the Search icon. Click “Galaxy Store” in the search results screen to enter the interface of its app info.
Step 3. Click on Storage. Then tap Clear cache or Clear data in the lower right corner of the screen.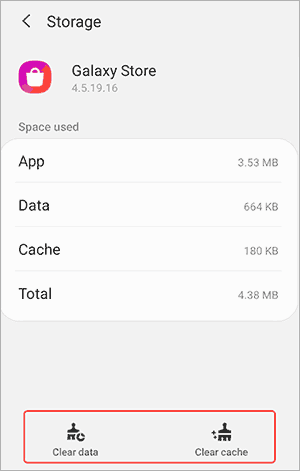
Step 4. Return to the interface of Galaxy Store info. Tap Force stop in the lower right corner of the interface. Then restart your Samsung phone to see if the problem persists.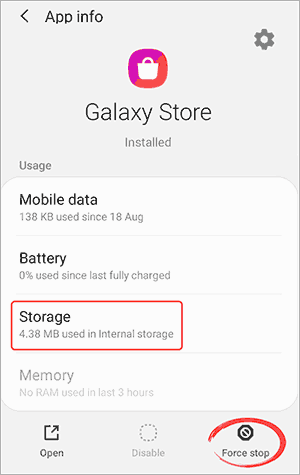
2: Reset app preferences
Other software related to the Galaxy Store may be faulty, causing problems with the Galaxy Store as well. Therefore, you can reset app preferences to troubleshoot problems with other software. You can reset app preferences in the way below.
Step 1. Swipe down from the top side of the screen and find the Settings icon. Tap it.
Step 2. Swipe up the screen and find Apps. Click it to see all apps.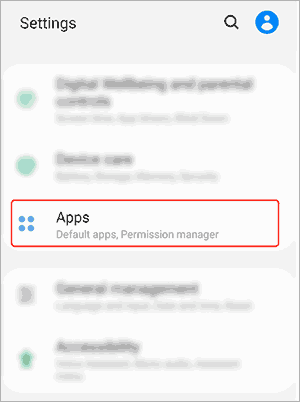
Step 3. Click on the three-dot icon in the upper right corner of the screen. Then tap the option of Reset app preferences. Then reboot your device to check for the problem.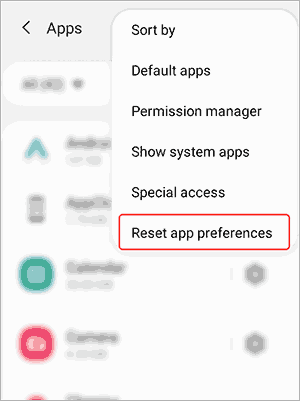
3: Wipe cache partition
Performing a wipe cache partition can remove temporary files that may cause a problem. It is worth trying because it won’t do any harm to personal files and might fix the Galaxy Store error.
Step 1. Turn off your Samsung phone.
Step 2. Put your device into Recovery mode. Press and hold the Volume Up, Power, and Home key together. Release all buttons when the Samsung logo appears.
If your phone doesn’t have a Home key, press and hold the Volume Up and Power key together. If your phone is with a Bixby key, remember to press and hold the Volume Up, Power key, and Bixby key together.
Step 3. Press the Volume down key to choose Wipe cache partition. Then press the Power key to confirm. Choose the Yes in the same way. Use the Power button to perform a wipe cache partition.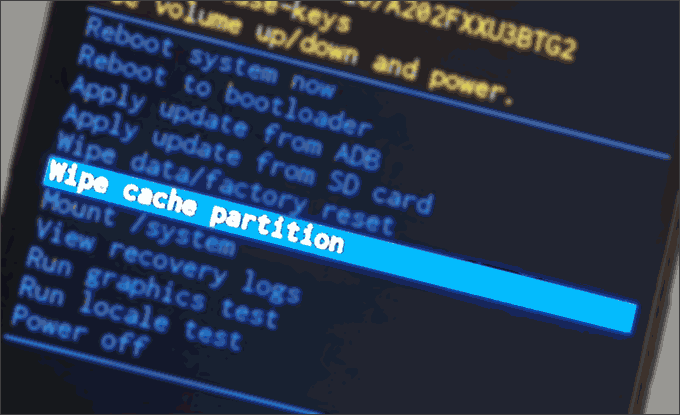
Step 4. Once the cache partition is wiped, the Reboot system now will be highlighted again. Press the Power button to reboot your phone.
4: Fix system problems through Android Repair Genius
If the above methods could not work, try reliable software to fix the Galaxy Store error. iSunshare Android Repair Genius is one of the trustworthy software you can use. It is a professional tool for solving various system problems of Samsung phones within a few clicks. Check how to make use of Android Repair Genius below.
Step 1. Remember to download, install and open iSunshare Android Repair Genius. Then connect your phone to a Windows computer via a USB cable. If your computer fails to detect the phone, click Install to install a USB drive for detection. Then click the Start button.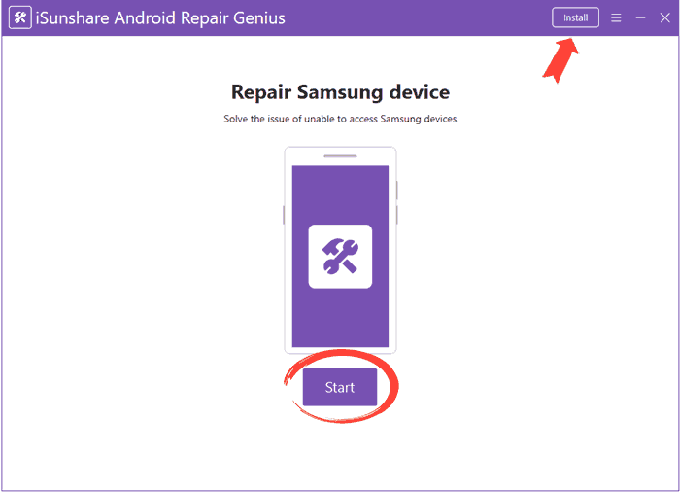
Step 2. Input the device information according to the Tips. Then click Paths to choose a file location for download and decompression. Click the Download button.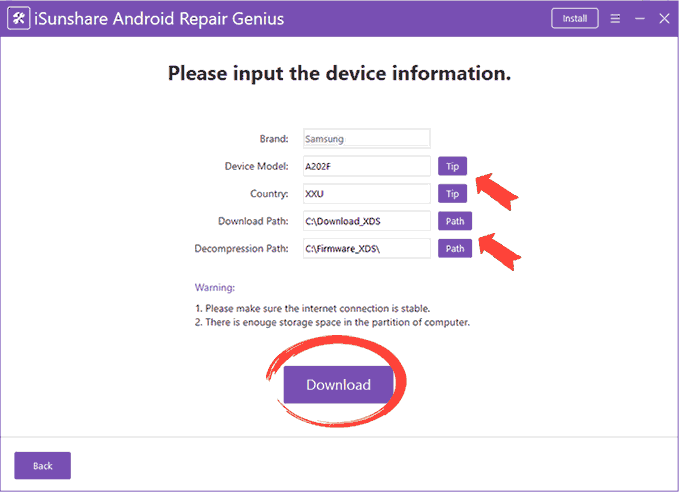
Step 3. Wait for the system package to be downloaded. Then wait for the app decry packet for your device.
Step 4. Put your Samsung phone into Download Mode according to the steps. Then click Start to repair your phone.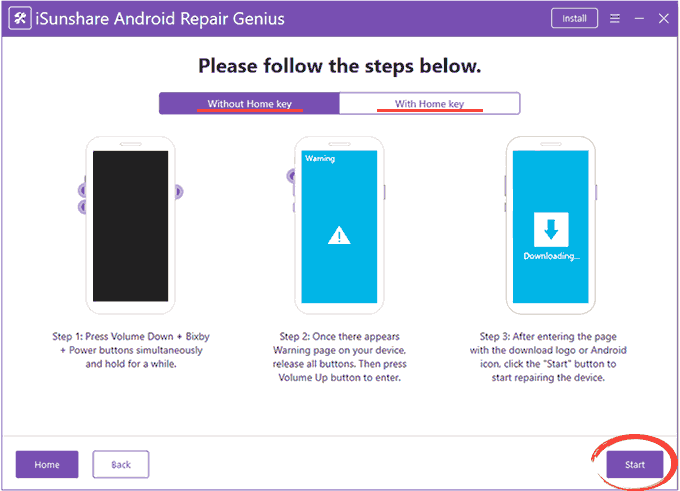
Step 5. iSunshare Android Repair Genius will begin to repair your device. Wait till the repair is completed.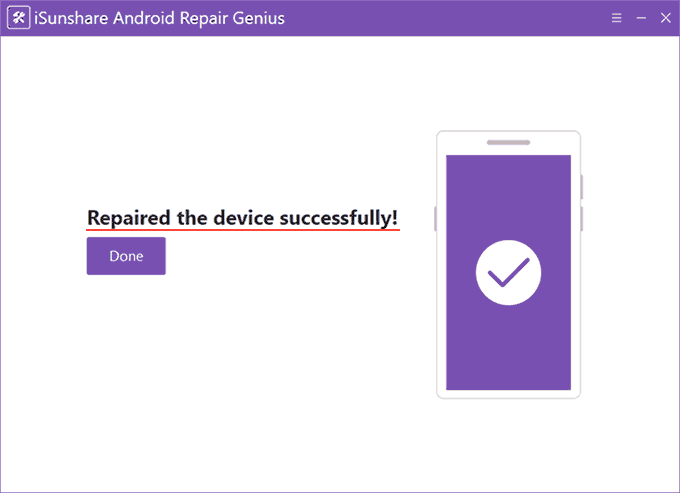
5: Perform a factory reset
Performing a factory reset is the last method to fix the problem. Be cautious to factory reset your phone for it will delete all user data. Of course, you can back up all the data before resetting your phone. Then you can follow the procedures to factory reset your device.
Step 1. Go to Settings. Click the Search icon beside the Settings.
Step 2. Type factory reset on the search box. Then click the option closest to Factory Reset on the results page. Choose Factory data reset. Then click Reset on the next page.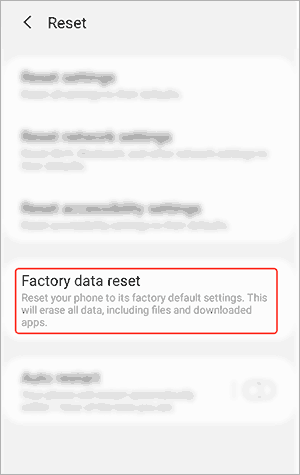
Step 3. Follow the instructions to set up your device anew.
Related Articles: