GPU works on displaying the screen content and locates on the graphics card/motherboard/CPU inside your computer. It can overheat easily when you are playing games or running programs which occupy a lot of GPU. To keep GPU healthy, it’s necessary to monitor the GPU temperature usually and you can check the GPU temperature of your Windows 10 PC with the 2 useful ways below.
Note: Generally, the GPU temperature can be detected when the GPU is present on the dedicated graphics card.

1. Check GPU Temperature in Windows 10 via Task Manager
Starting with Windows 10 Build 18963, the GPU temperature option is added to Task Manager. To view this option, your computer needs to meet the following conditions.
- There is a dedicated GPU card in your Windows 10 pc.
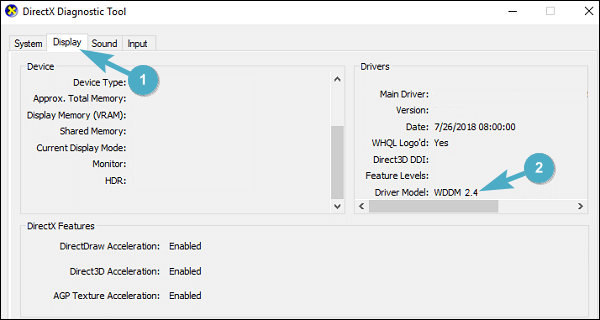
- The GPU card driver supports version 2.4 (or higher) of WDDM. You can check the WDDM version by searching dxdiag in the Start menu and enter it > switch to the Display tab > view the WDDM model in the right pane.

If your computer fulfills the requirements above, just follow the operations to try the new feature.
Step 1: Type Task Manager in the start menu and run it as an admin.
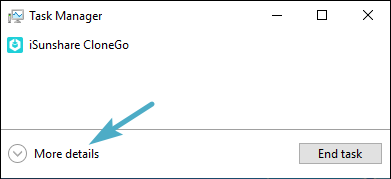
Step 2: Click More details in the lower-left corner.

Step 3: Switch to the Performance section.

Step 4: In the left pane, select GPU and then you can see the GPU temperature.

Microsoft
2. Check GPU Temperature in Windows 10 with Tool
If you can’t test the GPU temperature of your Windows 10 pc with the way above, don’t be sad, you can still check the GPU temperature with a tool. As some manufacturers of graphics cards would develop specialized tools for users to monitor their graphics cards like Radeon Overlay for the AMD Radeon graphics card, you can check whether there is a customized tool for your GPU card.
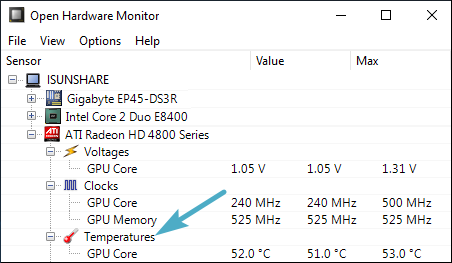
Or you can search the third-party tool for checking/testing GPU temperature in the Internet and find the suitable one to monitor the GPU temperature of your Windows 10 pc.

Openhardwaremonitor
Related Articles: